
Abstract
Microimplants have changed the face of orthodontic clinical practice. One of the most important factors in a practice is reduced chairside time for the patient as well as the clinician. This article presents a short clinical tip for accurate placement of microimplant.
Mini-implants have proved to be a blessing in the world of contemporary orthodontics. A tiny temporary anchorage device (TAD) has led to great success in terms of widening the scope of orthodontic treatment, owing to its ease of placement and removal. However, success of a mini-implant depends upon various factors such as clinician’s skill, bone density, and site of placement.1, 2 It is important to determine the accurate site of placement to prevent failure of these implants and to protect the underlying structures, minimizing patient discomfort. 3
Here, we have developed a simple yet efficient chairside technique to place mini-implants.
Method
To fabricate the “Insta-Jig” we need:
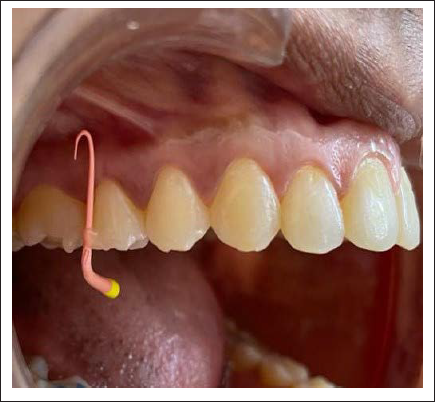
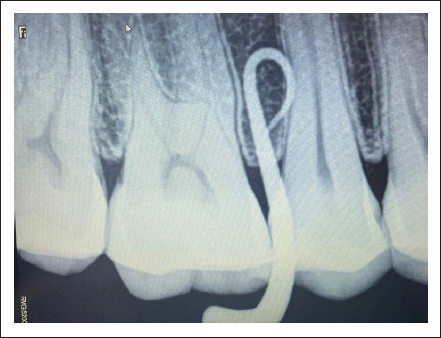
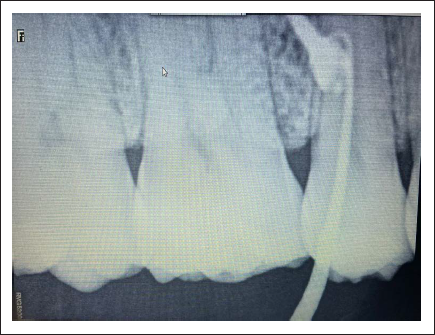
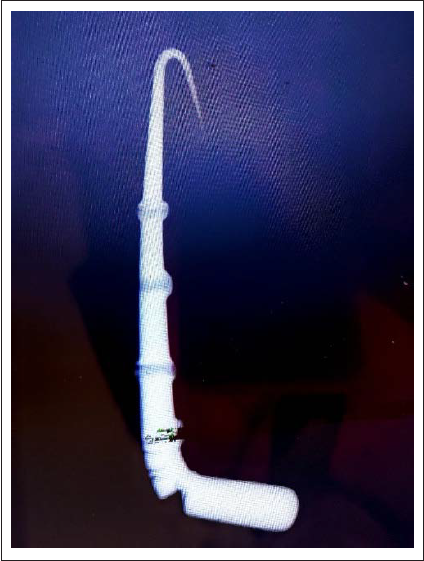
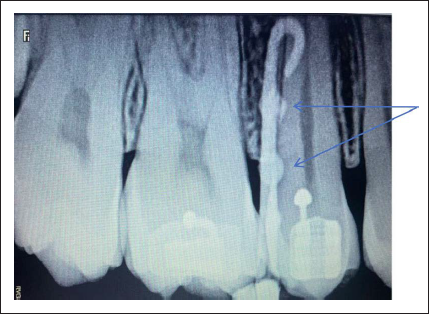
Gutta percha point (GP) Flowable composite Straight Probe Step 1: Examine the site of placement of the mini-implant. Step 2: Bend the color coded part of gutta percha at 90° angle to create a short horizontal arm and a long vertical arm (Figure 1). Step 3: Place the GP point at the site of mini-implant placement in such a way that the short arm lies somewhat parallel to the occlusal plane and the long arm points toward the vestibule (Figure 1). Step 4: Bond the vertical arm of GP point to the adjacent teeth using flowable composite (Figure 1). Step 5: Bend the tapered edge of the long arm of Gutta percha point to make a small loop, the loop should coincide with the arbitrary point of placement of mini-implant (Figure 1). Step 6: Take a radiograph using paralleling technique to appreciate the position of the Insta-Jig for placement of TAD (Figure 2). Step 7: Place the mini-implant and confirm the position using a radiograph (Figure 3).
Place the GP Point at the Site of Mini Implant Placement.
Radiograph of GP Point at the Site of Placement.
Microimplant Placed at the Site with the Jig in Place.
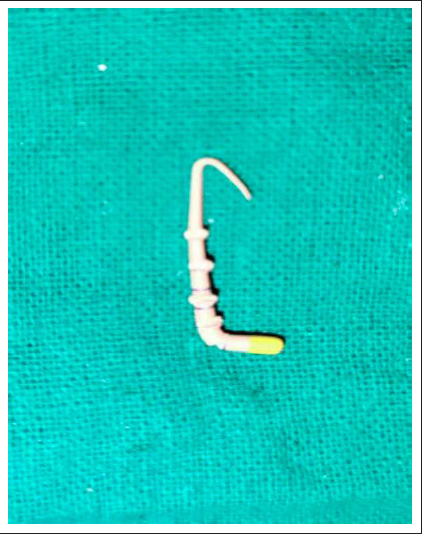
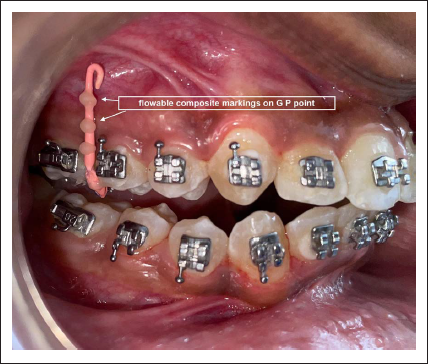
Markings can also be made on the GP point using a heated probe to create a graduated scale (Figures 4 and 5). Use of flowable composite is another method to create markings on the GP point (Figures 6 and 7).
Graduated Markings made with a Heated Probe.
Radiograph Showing Markings on GP Point.
Flowable Composite Markings on GP Point.
Radiograph of Flowable Composite Markings on GP.
Advantages of this technique are:
Simple and quick chairside method. It does not require any special instrument for fabrication. Gutta percha is easy to manipulate and fold, making it possible to customize for every patient. This method eliminates wire bending for jig fabrication. These materials are easily available in any clinical set up, user friendly, and radio-opaque.
Footnotes
Declaration of Conflicting Interests
The authors declared no potential conflicts of interest with respect to the research, authorship and/or publication of this article.
Funding
The authors received no financial support for the research, authorship and/or publication of this article.