
Abstract
This paper describes a new casting system for transtibial socket fabrication. Like the earlier CIR Sand Casting System, the CIR Casting System is based on the ‘dilatancy’ principle that is similar to the packaging process for coffee beans by which loose beans become a solid mass when a vacuum is applied. The main difference from the CIR Sand Casting System is that the CIR Casting System uses light-weight, polystyrene beads in place of silica sand as the primary material for casting the negative mold. The formed negative mold can be converted into a positive sand model for modification and socket formation. With the new plaster-less casting system, the prosthetist can fabricate a transtibial prosthesis in about one hour. It reduces the set-up cost, overall weight and size of the casting system, and increases portability for service in remote areas. The System also creates minimal waste and is energy-conserving and environmentally-friendly.
Keywords
Introduction
Plaster-of-Paris has been effectively used as the primary casting material for prosthetics socket fabrication. The plaster-based procedure is time-consuming and complicated. In addition, Plaster-of-Paris may not be readily available in some developing countries. To address this global challenge, we developed a socket fabrication method based on the dilatancy principle, 1 called the CIR Sand Casting System, 2 to improve the prosthetics fabrication process. ‘Dilatancy’ is a phenomenon by which granules, such as silica sand, polystyrene beads, coffee beans or glass beads, within an enclosed flexible container can be rapidly made into any shape and held for as long as the air inside is evacuated. Dilatancy was applied in prosthetics research in the 1940s 1 and has been widely adapted for custom-made wheelchair cushions.
The CIR Sand Casting System (Figure 1) uses silica sand as the casting material for making an impression of the amputation stump and a positive sand model. The system was independently evaluated at the Vietnamese Training Center for Orthopedic Technologists (VIETCOT) in Hanoi, Vietnam in 2003. 3 Although results of the ISPO-sponsored field evaluation showed that the formed sockets were noted to be ‘loose’ in many cases ‘… the sand-casting technique offers an interesting alternative to Plaster-of-Paris casting, but cannot eliminate the involvement of a professional prosthetist. It might contribute to a more consistent good fit, if correctly used, and does make it possible to manufacture a finished prosthetic socket in less than one hour’.
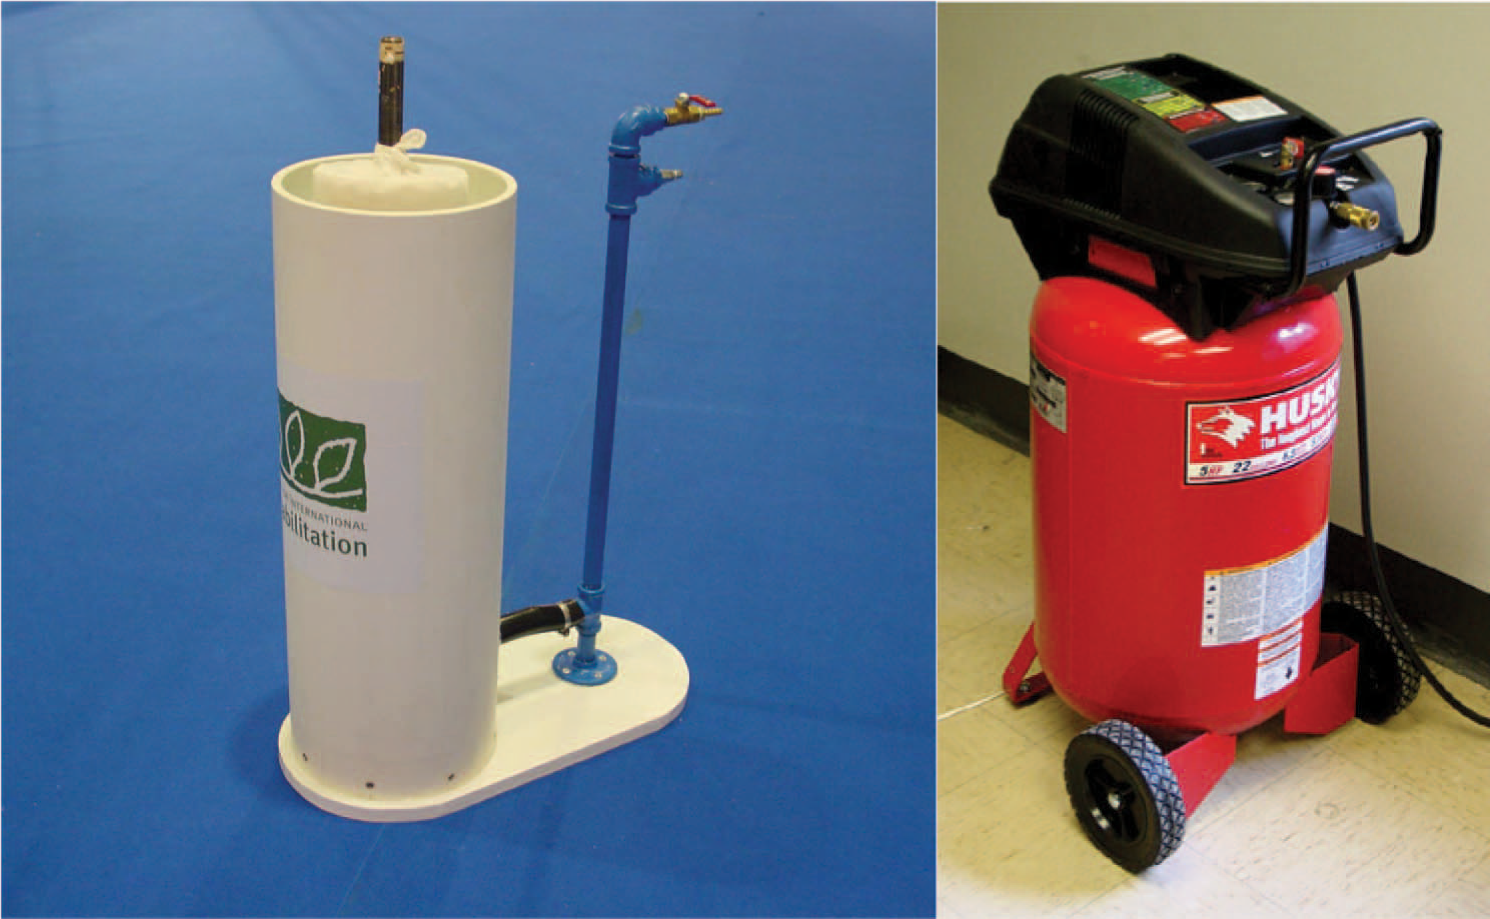
Earlier CIR Sand Casting System included a sand container (left) and an air compressor (right) for making the negative mold.
In the fall of 2005, we developed an improved system, CIR Casting System, which greatly simplified the socket fabrication procedure. 4 Data from a case study in our laboratory showed an improvement in obtaining a precise positive model over the CIR Sand Casting System (Figure 2). Further field evaluation at the VIETCOT showed that the CIR Casting System improved patient compliance, increased rate of a good socket fit, and eliminated the problem of loose socket fit. 5
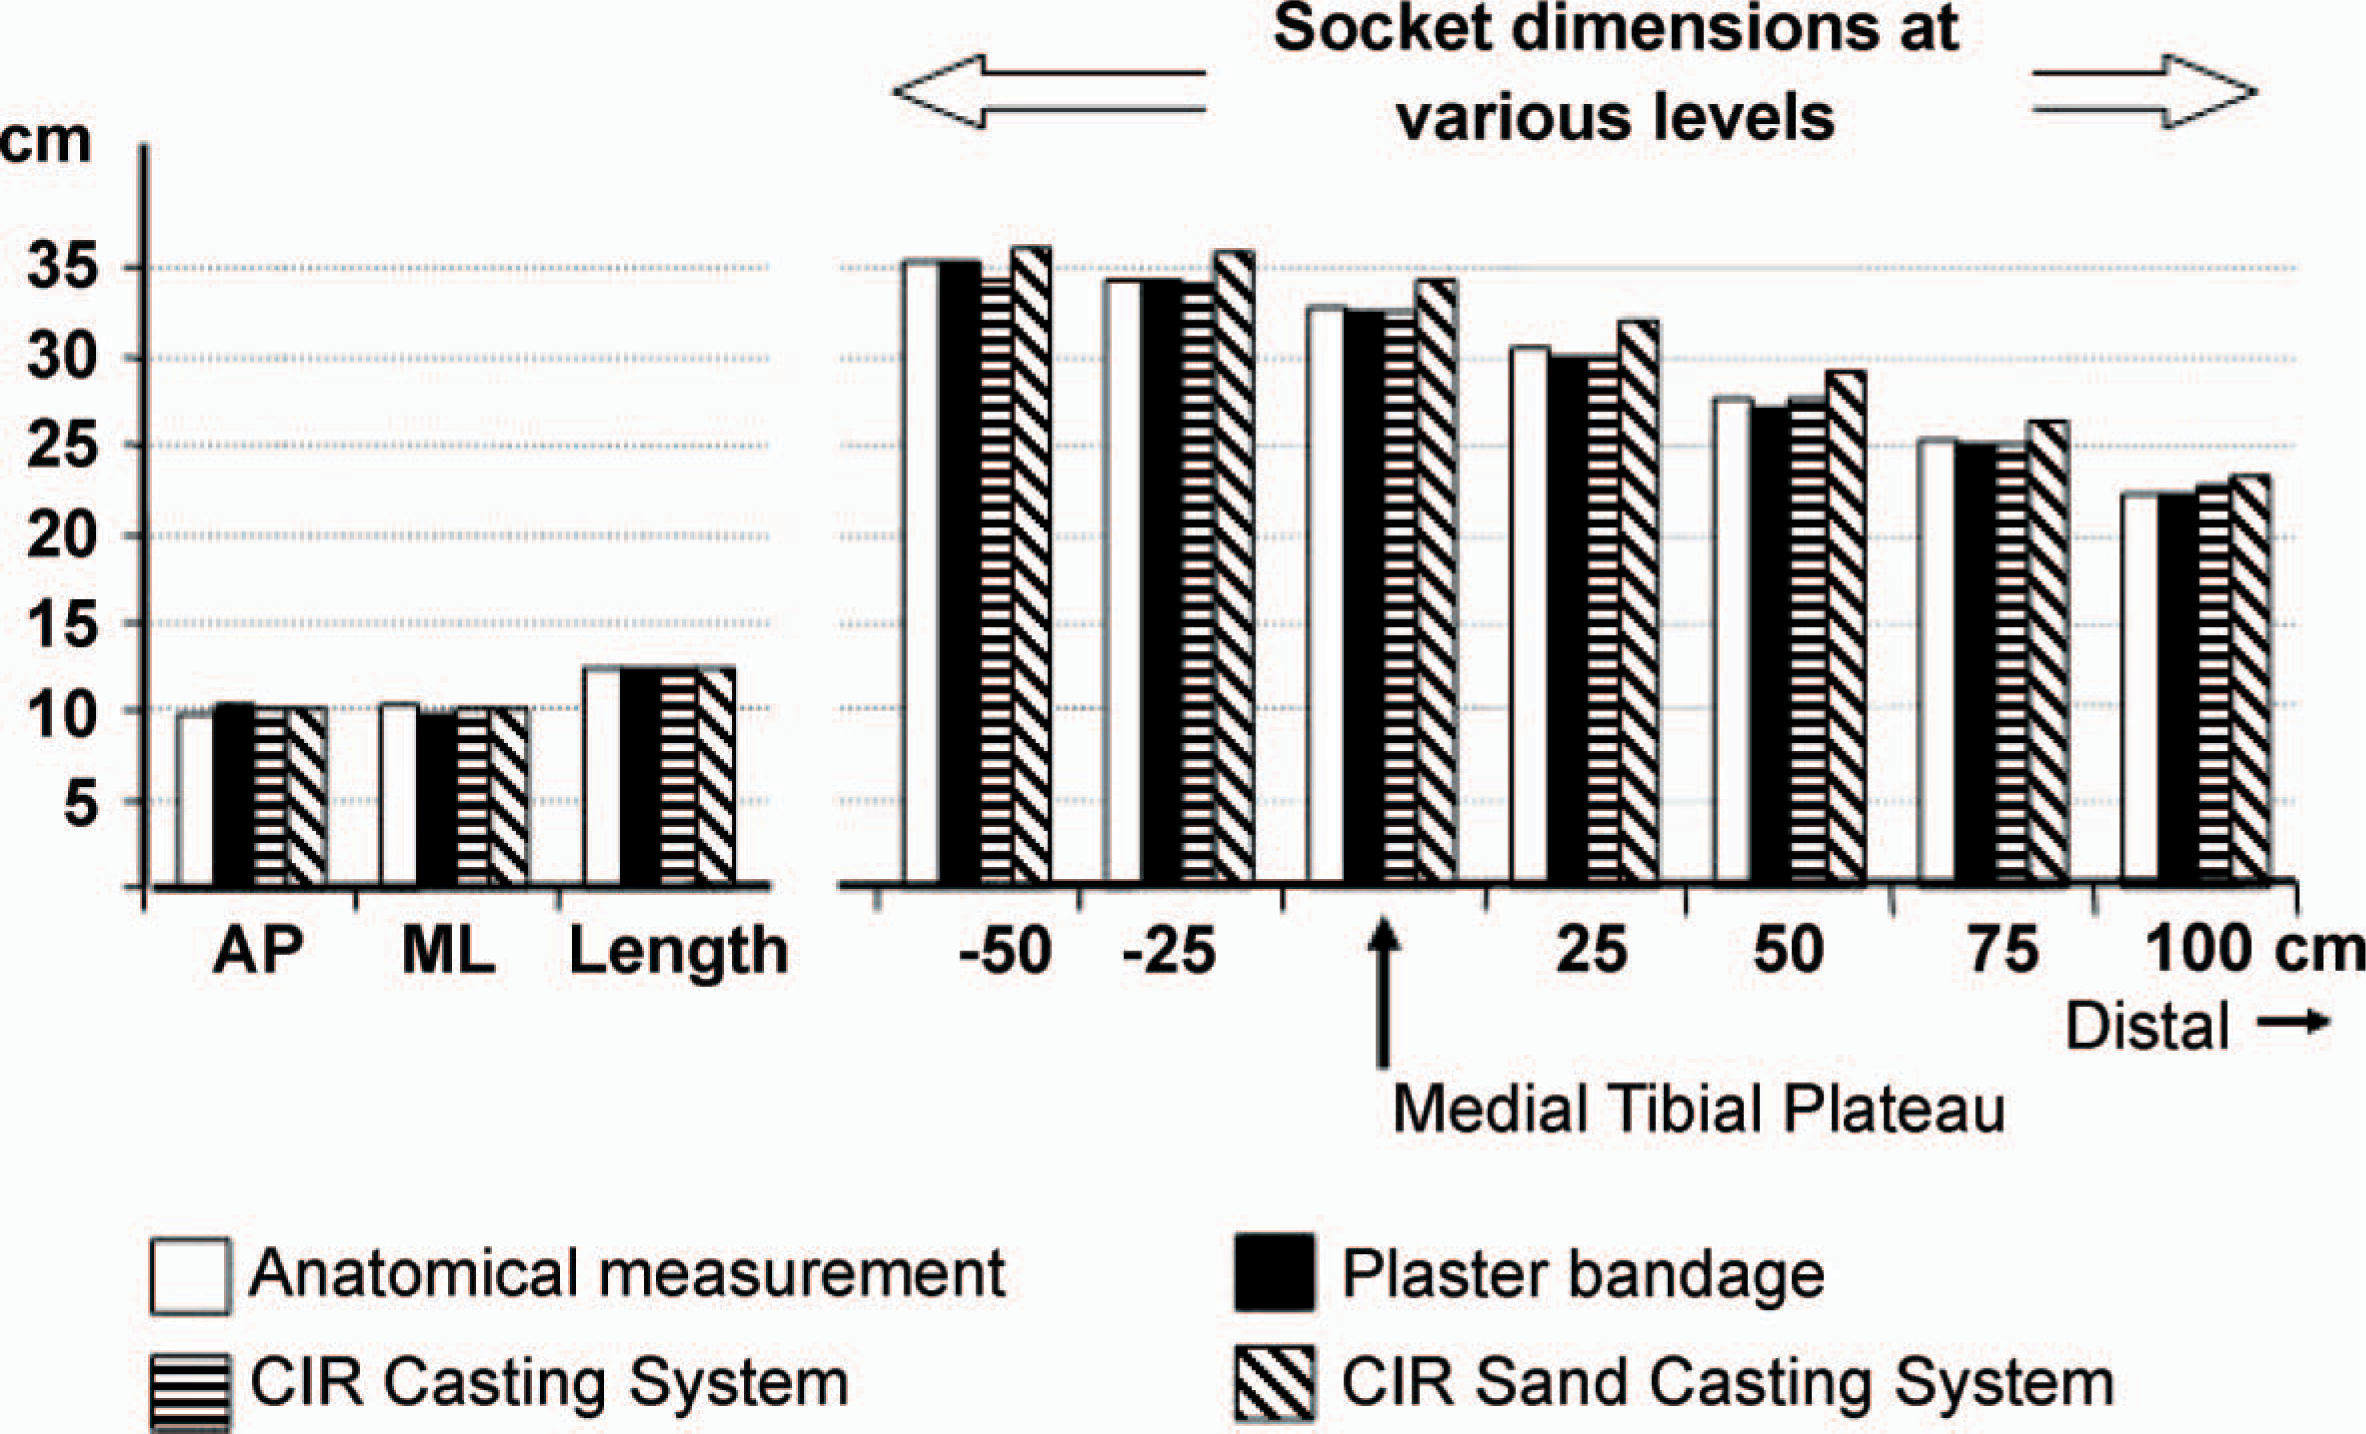
A single case study on comparison of three casting methods.
The CIR casting system
In addition to a heating oven and a vacuum pump with a surge tank, the main equipment needed for making a transtibial socket include:
CIR Casting Bag is made of elastic fabric and filled with micro-polystyrene beads (Figure 3). This reusable casting bag replaces plaster bandages in the traditional method, or the sand container and an air compressor used in CIR Sand Casting System (Figure 1) to cast the amputation stump.
The CIR Casting Bag.
Vacuum Mandrel is made of steel pipes with a 12 mm inside diameter and 30 cm in length, with a male air hose connector on one end and a sand filter on the other. It is used to vacuum form the positive sand model (Figure 4).
The vacuum mandrel for making the positive sand model.
3. Plastic Bags, 0.75 mm thick and about 40 cm by 80 cm in size (Figure 5, left), are used as the flexible container for the CIR Casting Bag. They are used to make the negative mold and the positive sand model.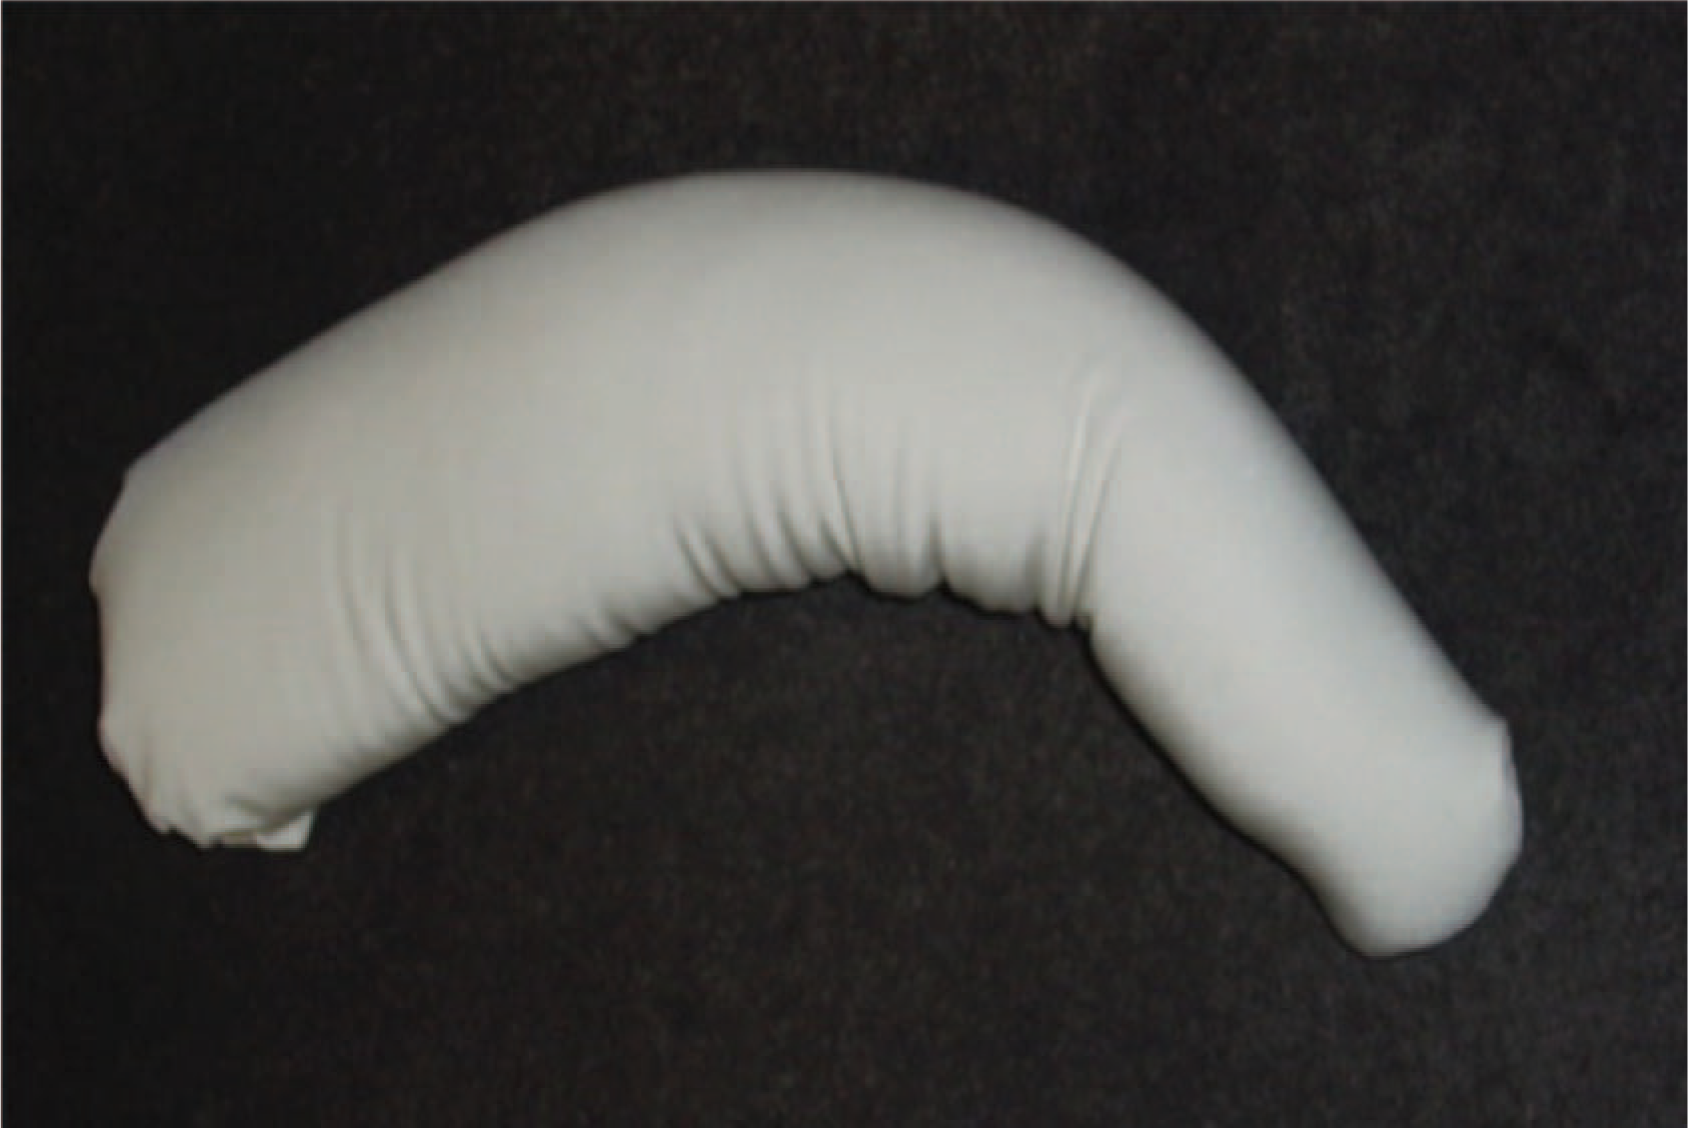

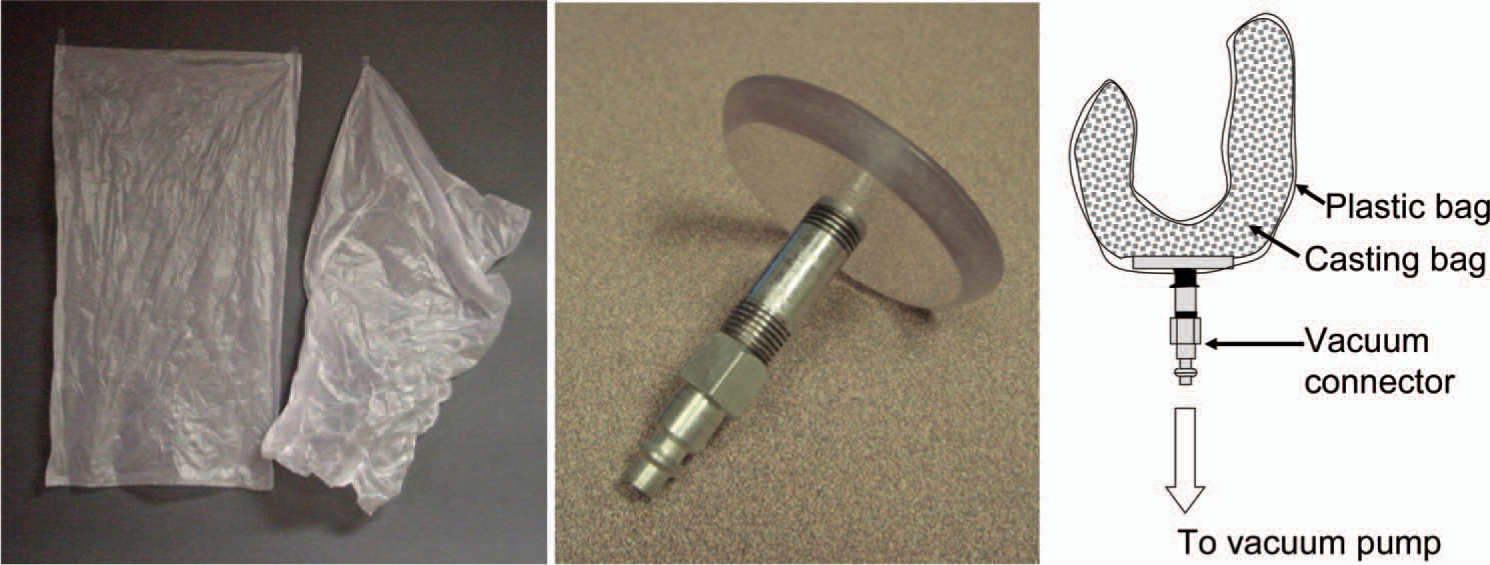
Thin plastic bags (left) and vacuum connector (center) are used to seal the CIR Casting Bag for forming the negative mold (right).
Vacuum connector is made of a plastic plate, a steel pipe and an air hose connector (Figure 5, center). When incorporated with a plastic bag, it seals the CIR Casting Bag and allows the air inside to be evacuated (Figure 5, right).
Aluminum splint, made of six to 10 layers of aluminum foil, is used to form a casting brim by capturing the shape of the popliteal area of the flexed amputation limb (Figure 6).This casting brim is used during modification of the positive sand model.
The reusable aluminum splint (left) is held by both hands against the flexed knee (center) to form the casting brim (right).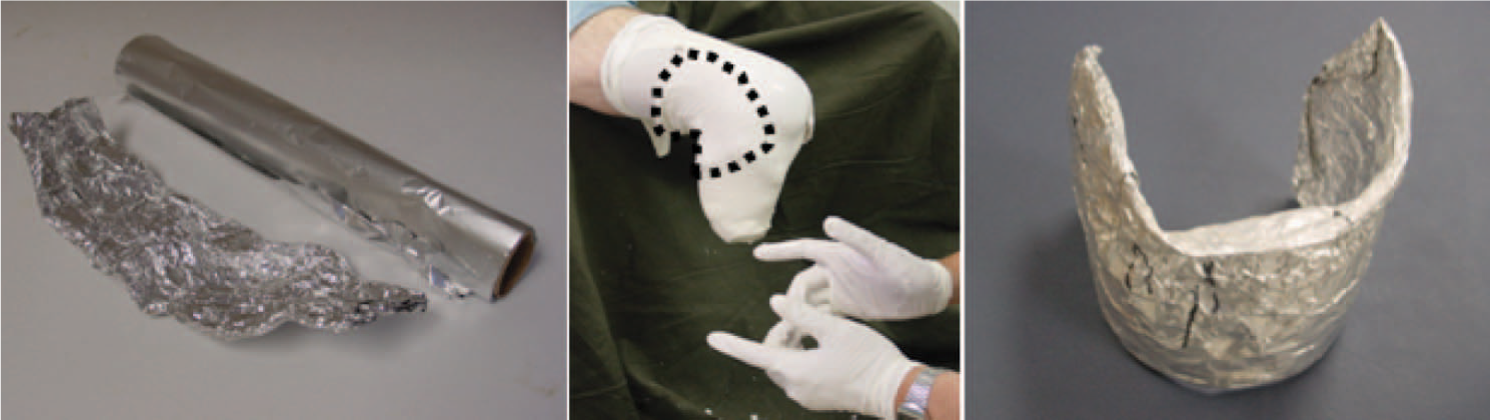
Fabrication of transtibial socket
For the purpose of describing the procedure, a ‘plaster replica’ of the amputation stump is used. The process for fabricating a transtibial socket includes five steps:
(I) Making the casting brim for posterior trim line
Use aluminum splint, 10 cm wide and 25 cm long (Figure 6, left) to capture the shape of the popliteal area of a flexed knee (Figure 6, center). This formed casting brim (Figure 6, right) will be used to form the posterior trim line during modification of the positive sand model (Figure 9).
Applying a nylon sheath, the first plastic bag and the CIR Casting Bag (left) onto the amputation stump (right).

Steps of sealing the CIR Casting Bag with the first plastic bag from inside and the second plastic bag from outside.
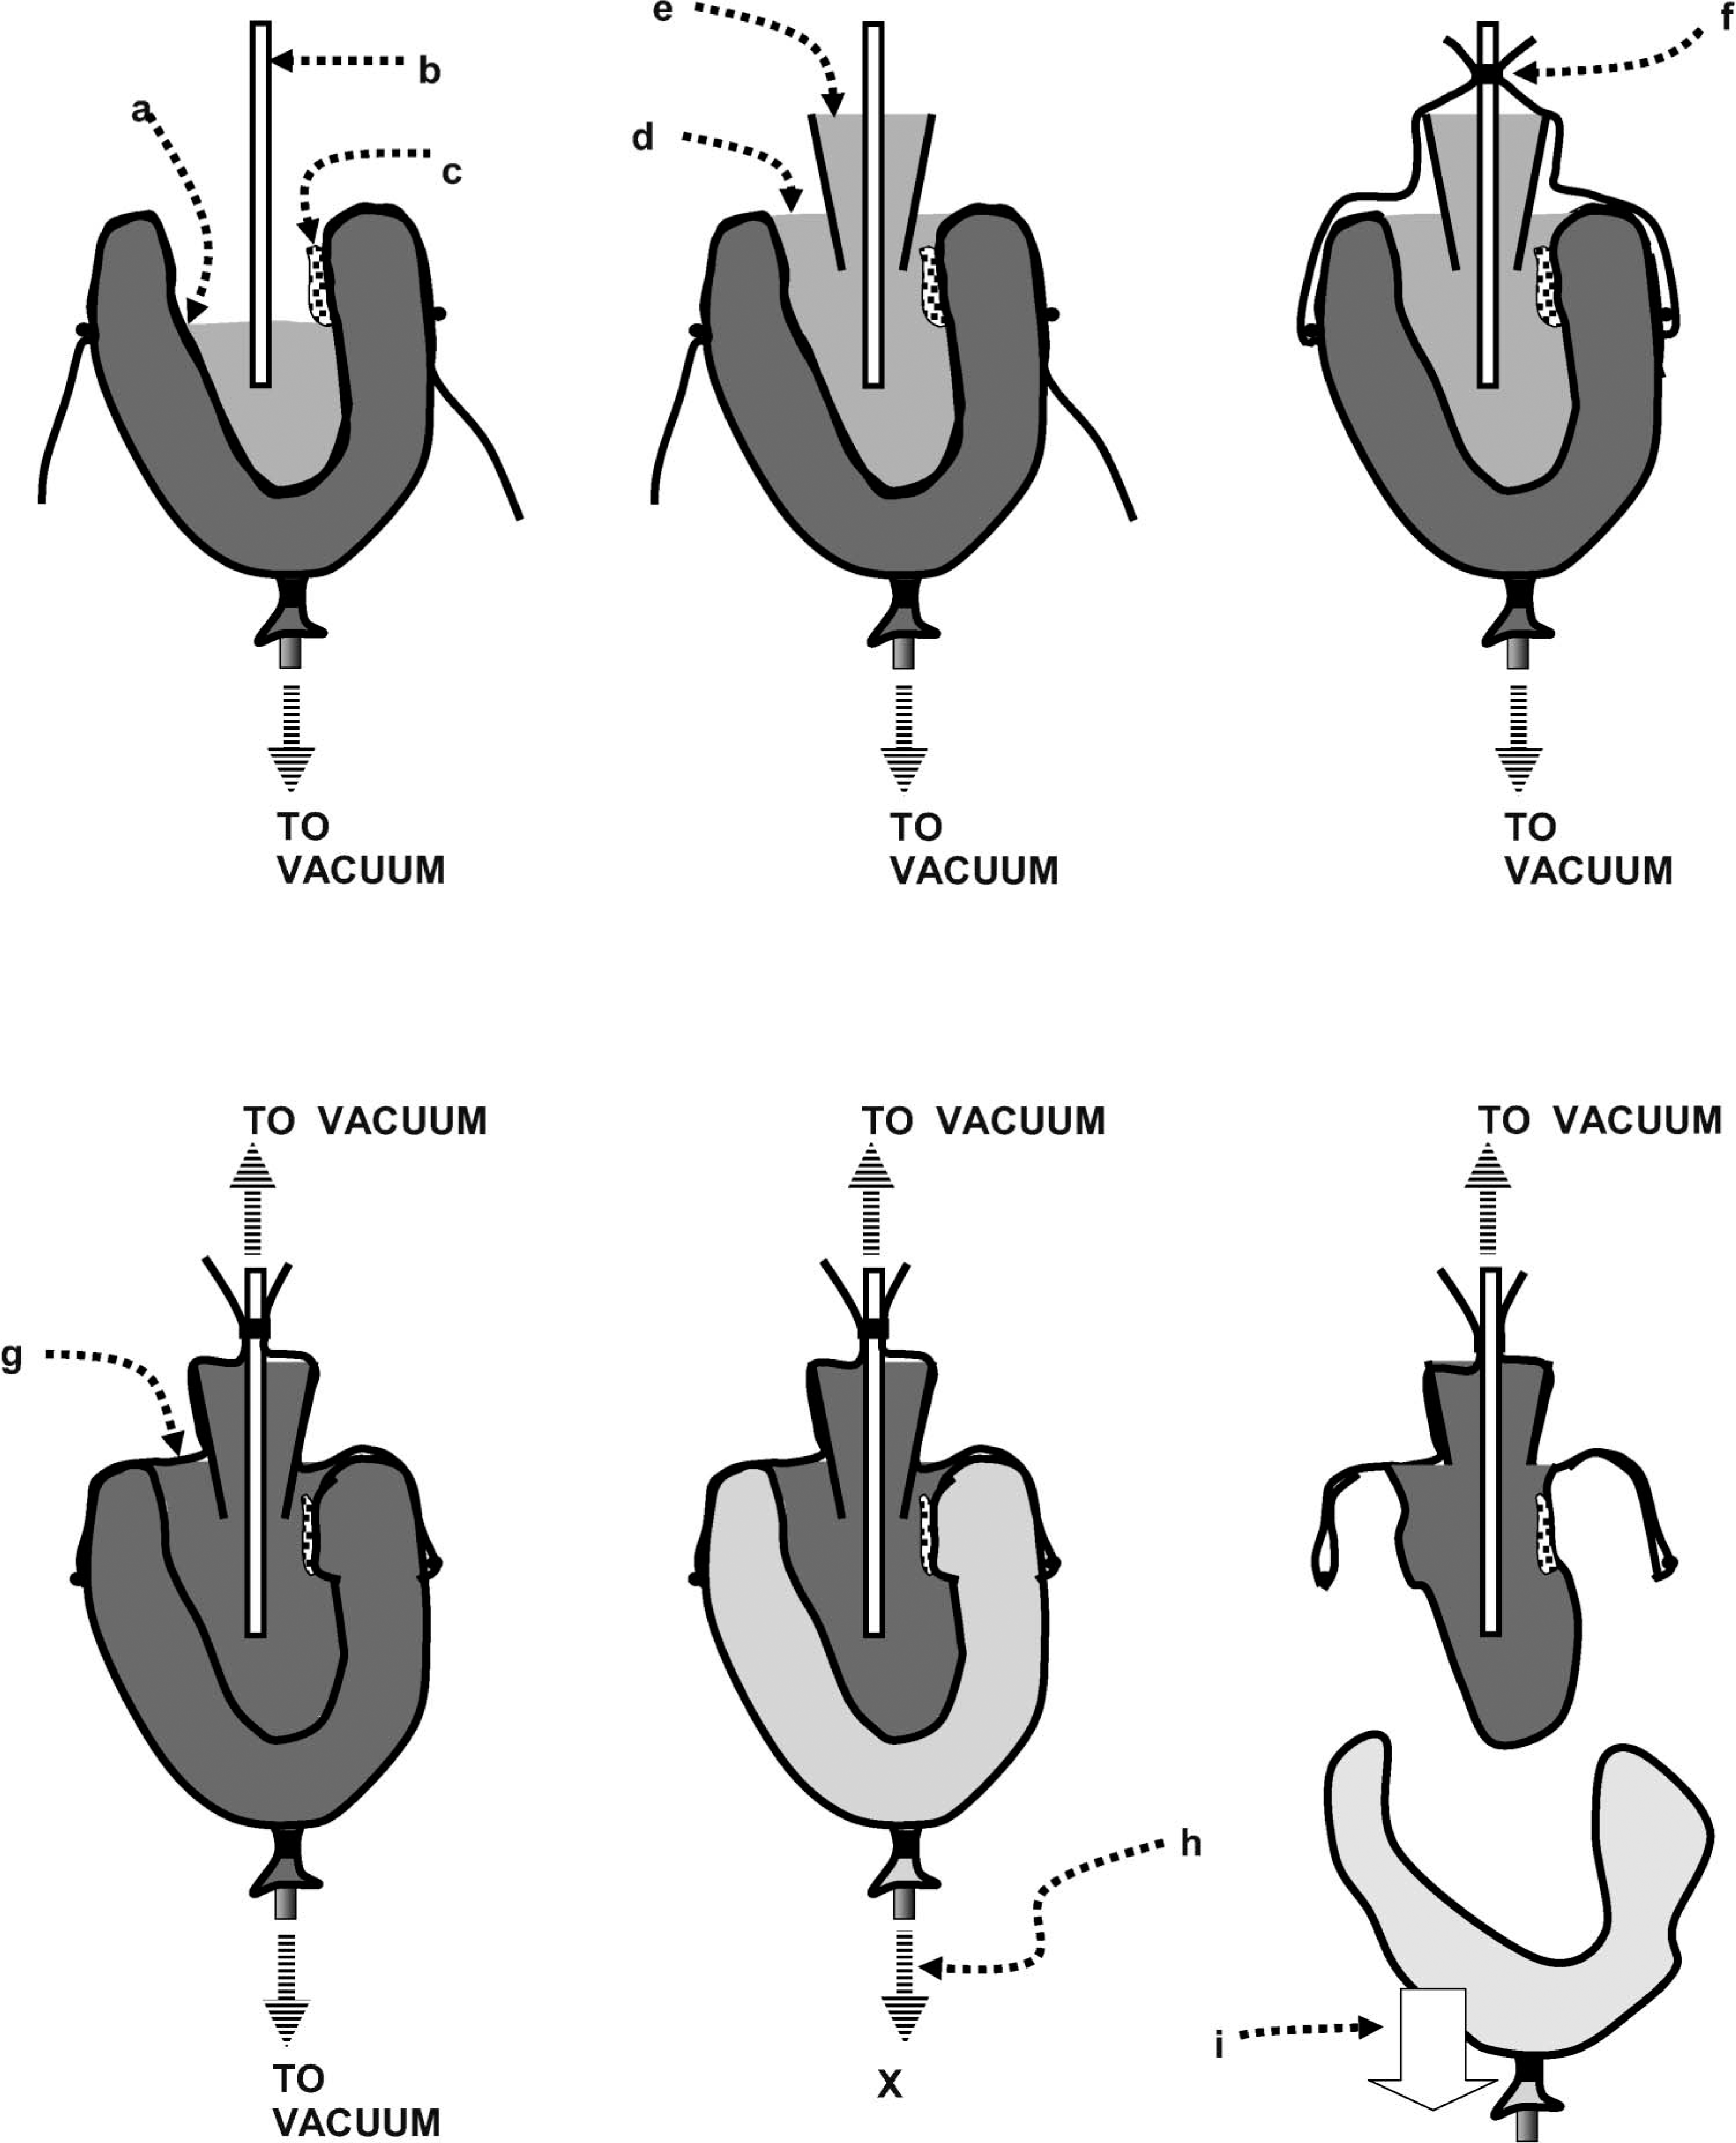
Steps of converting the negative mold into a positive sand model.
(II) Creating the negative mold
With the patient sitting, apply a nylon sheath and the first plastic bag over the amputation stump, then roll the CIR Casting Bag evenly above the socket trim line (Figure 7).
Use the following steps to seal the CIR Casting Bag: (1) Use the second plastic bag with the vacuum connector (Figure 5, right) to cover the CIR Casting Bag (Figure 8a); (2) use a rubber band to hold the second plastic bag onto the CIR Casting Bag (Figure 8b); (3) then pull the first bag downward to cover the second plastic bag (Figure 8c); and, (4) use another rubber band to secure the first plastic bag over the second plastic bag (Figure 8d).
Once the CIR Casting Bag is sealed, connect the vacuum pump and evacuate the air. Within a few seconds, the CIR Casting Bag will become a solid negative mold, which can be used as a check socket to determine fitting comfort. Repeat the procedure if necessary until the patient is comfortable with pressure bearing in the negative mold. When satisfied with the formed negative mold, proceed to the next step.
(III) Making the positive sand (or glass beads) model
Using the negative mold to make a positive sand (or glass beads) model takes several steps (see Figure 9): Fill the negative mold with sand up to the patellar tendon level; Insert the vacuum mandrel in the center of the negative mold; Place a soft sponge against the posterior wall; Fill with more sand to the brim of the negative mold; Insert a bottom-less plastic cup on top of the sand around the vacuum mandrel. Then, fill the cup with sand to its brim; Fold the first plastic bag upward from the side of the negative mold and tape it to the vacuum mandrel in order to seal the sand inside the cavity of the negative mold; Connect another air hose from the vacuum pump to the vacuum mandrel and evacuate the air to form a solid positive sand model; Disconnect the first air hose from the negative mold; and finally, Remove the CIR Casting Bag to reveal the formed positive sand model.
(IV) Modifying the positive sand model
Modification of the positive sand model requires three steps: To modify the patellar tendon bearing (PTB) area, first puncture a small hole on the positive sand model to loosen the sand underneath. Then, use a smooth pipe to depress the sand and form the PTB bar. When finished, seal the punctured hole with a piece of electrical tape to keep the positive sand model in solid condition under vacuum suction. For pressure relief over the bony prominences and any sensitive areas use water-based clay for building up. To assure the correct location for pressure relief over the areas that can not be easily identified, tape a small piece of pelite on the skin to create an indentation on the negative mold and a small elevation on the positive sand model. To form the posterior trim line, place the aluminum casting brim (Figure 10, left) on the back of the positive sand model as a mold and press water-based clay into the gap (Figure 10, center). Use the PTB bar as a guide to determine the placement of the aluminum casting brim.
Use the aluminum casting brim (left) as a mold (center) to build up with water-based clay the posterior trim line and flared wall (right).
When all modifications are done, cover the entire positive sand model with another thin plastic bag (Figure 11, left), then apply a nylon sheath in order to burnish any uneven surface with a spoon (Figure 11, center). After trimming off any excess plastic bag and taping the nylon sheath, the positive sand model is ready for vacuum forming the socket (Figure 11, right).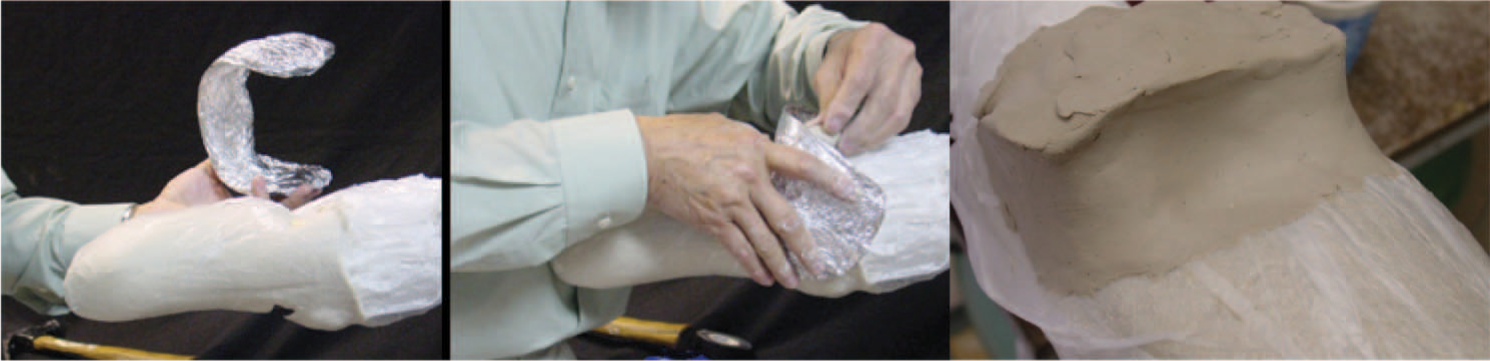

Final preparation of the positive sand model.
(V) Forming the socket
The process for forming the interface and the socket is similar to current prosthetics methods. De-molding is done by cutting open the plastic bag of the positive sand model to drain the sand. The socket is then assembled with a modular pylon, foot and shoe for gait evaluation.
Discussion
The prosthetic socket fabrication procedure described above was developed and tested at CIR, Chicago, IL, USA. CIR's Institutional Review Board, Independent Review Consulting, San Anselmo, California, USA approved all human subjects testing associated with the development of the CIR Casting System.
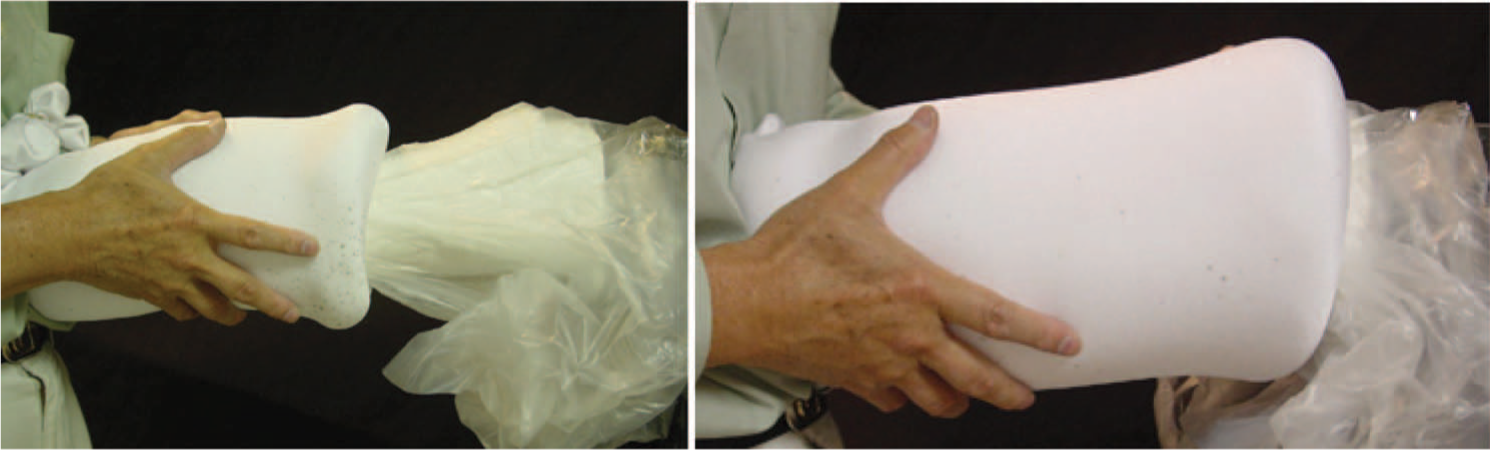
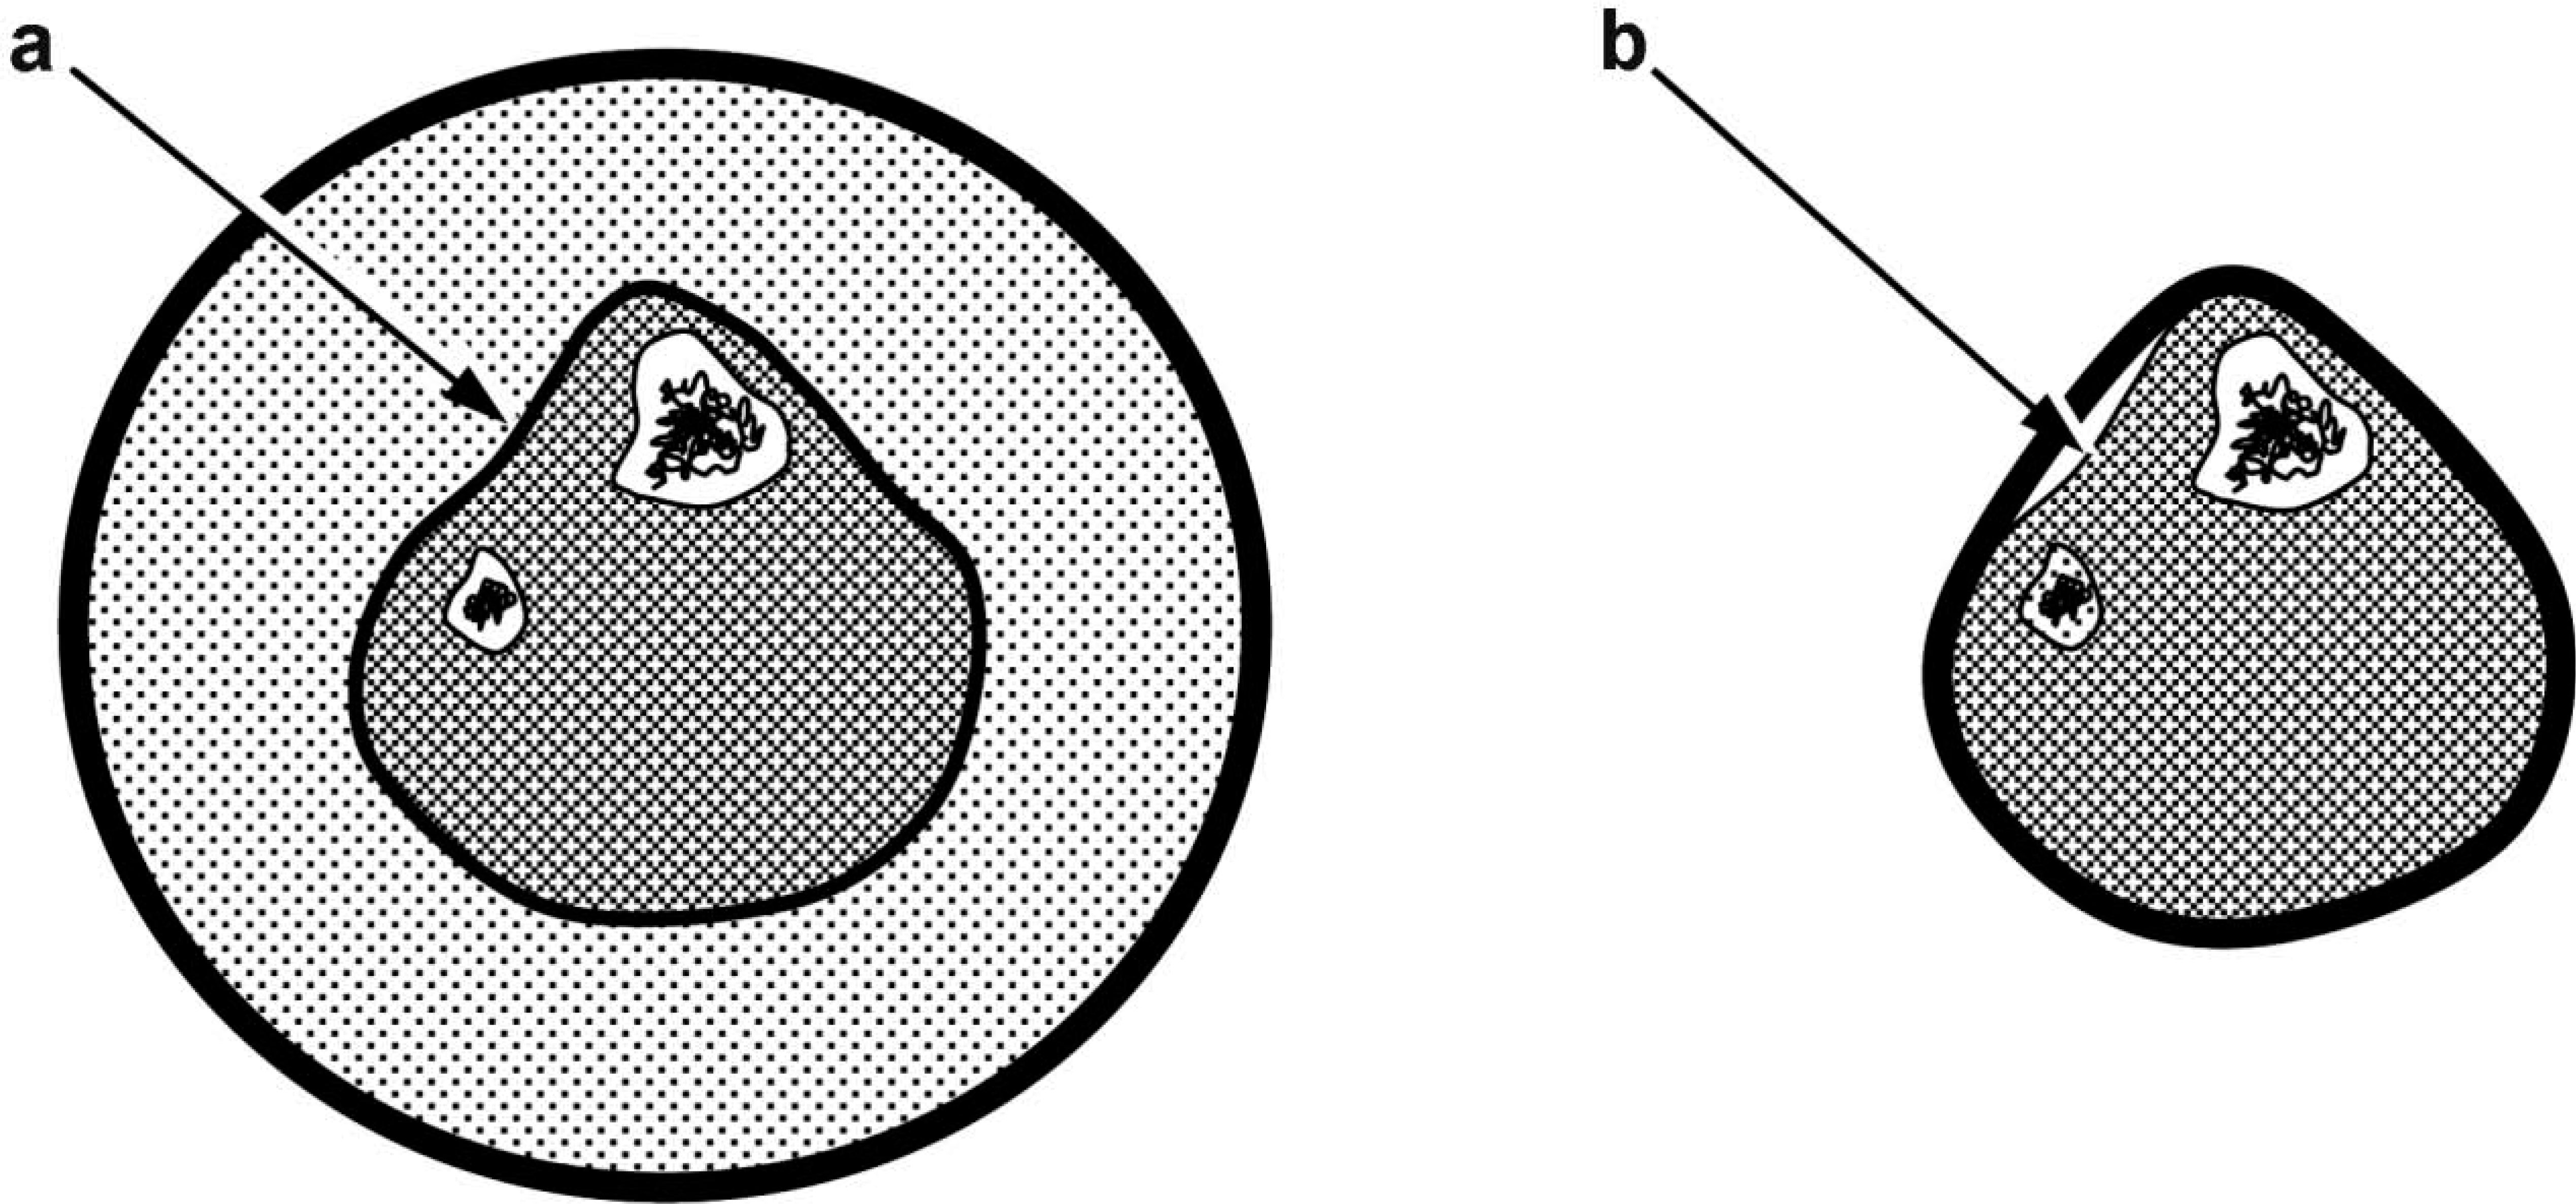
Aside from eliminating Plaster-of-Paris, which is a major cost saving and waste reduction, the CIR Casting System provides other advantages in socket fabrication: Using the CIR Casting Bag, one can form a transtibial socket in about 30 min. The de-molding process by draining the sand is rapid and runs no risk of damaging the formed socket. When applied on the amputation stump, the stretched CIR Casting Bag pushes its inner layer onto the amputation stump creating an intimate impression and avoids the gapping between the high points (Figure 12). The problem of loose sockets related to CIR Sand Casting System is thus eliminated.
5
Compression from the stretched CIR Casting Bag (left) creates an even pressure over the amputation stump resulting in a precise impression (a) and avoids gapping between high points (b) when cast with elastic plaster bandages (right). Without the need for traditional manual manipulations on the amputation stump, it increases the reproducibility by different practitioners.
5
The set up of the CIR Casting System is much cheaper and simpler than that of the CIR Sand Casting System, which requires a large sand container and an air compressor.
Conclusion
Fabrication of high-quality transtibial sockets in a cost-effective and time-efficient manner can be achieved using the new CIR Casting System. The CIR Casting System uses light-weight polystyrene beads as the primary material for making the negative mold, which can be converted into a positive sand model for modification and vacuum forming a socket. The setup and maintenance costs for this new casting system are minimal. It is a lightweight and portable system suitable for services in remote areas. Using the CIR Casting System the prosthetist can fabricate a transtibial prosthesis during the patient's single clinic visit. In addition, being a plaster-less system, the CIR Casting System creates minimal waste and can be seen as an environmentally-friendly system.