
Abstract
This article describes the use of Zazzle to create custom official United States postage stamps suitable for a history of psychology class or departmental fundraiser. An example U.S. postage stamp representing the African-American behavioral scientist Charles Henry Turner is described. Step-by-step instructions on how to construct the stamps and insert Quick Response Codes (QR Codes) linked to internet sites are presented. Ways of incorporating the stamp project into a history of psychology class are discussed. Examples of stamps related to schools of psychology and contributions of women, African Americans, Hispanic Americans, Native Americans, and the Japanese to psychology are presented.
This article illustrates the use of customized United States postage stamps to honor significant figures in psychology and to serve as departmental fundraisers suitable for psychology club and/or Psi Chi (Satterfield & Abramson, 1998). The impetus for this work comes from two sources. First, it is another in a series of publications from our laboratory describing student activities for a history of psychology class. Our previous efforts include the development of psychology themed “baseball cards,” calendars, and board games (Abramson, Burke-Bergmann, Nolf, & Swift, 2009), the use of Google Earth to visit historical places in psychology (Stevison, Biggs, & Abramson, 2010), the creation of Jeopardy!-like games using PowerPoint shareware (Lord, Martin, & Abramson, 2007), and the development of “concept cards” as a study aid for historical and other class material (Abramson, Robinson, Rice, Burley, Bergman, Delougherty, & Reudy, 2002).
The second motivation behind this article is to develop a series of commemorative postage stamps honoring significant figures in the history of psychology. The United States Postal Service (USPS) maintains a Citizens' Stamp Advisory Committee (CSAC) that reviews all suggestions for commemorative stamps. The CSAC makes recommendations for new commemorative stamps to the postmaster general and base their recommendations on a number of factors. These factors include historical perspective and national interest. This process can take many years.
In looking for ways that we could shorten the process, we decided to make our own official U.S. postage stamps. We will use as our core example the African-American scientist Charles Henry Turner (1867–1923). Dr. Turner's contributions are many and include (1) replacing the mechanistic view of insect behavior with a dynamic view reminiscent of the contemporary cognitive position, (2) apparatus design, and (3) the first investigations of classical conditioning in insects.
During a 33-year career Turner published over 70 papers on a variety of subjects using a variety of organisms. Most of his experiments were performed as a high school teacher in St. Louis, Missouri. Turner holds several distinctions, including the first African American to earn a Ph.D. from the University of Chicago, the first African American to publish in the journal Science, and the discoverer of a particular type of ant behavior that bears his name. In recognition of his many contributions both as a scientist and as a leader in the early civil rights movement, several schools carry his name. Seldom has a behavioral scientist been so honored and his story is truly inspiring (Abramson, Jackson, & Fuller, 2003; Abramson, 2006, 2009). A comprehensive website about Charles Henry Turner is available at: http://psychology.okstate.edu/museum/turner/turnermain.html.
The company we used to create our official postage stamp is Zazzle Custom Stamps (http://www.zazzle.com/custom/stamps). Zazzle produces custom stamps in a variety of sizes ranging from small (1.8 × 1.3 inches), medium (2.1 × 1.3), to large (2.5 × 1.5). The prices are inexpensive. For a sheet of 20 stamps, the prices range from $18.95 (small), $19.95 (medium) to $20.95 (large). Various denominations can also be ordered in addition to the standard first class postage stamp. Zazzle also offers the consumer a wide range of customizable products such as clothing, jewelry, bags, household items, sleeves for electronics, cell phone cases, office products, stationary, cards, as well as postage stamps.
Stamps can be used to teach as well as pique a student's interest in a wide array of subjects such as math, sciences, literature, current events, and cultural awareness. The subject matter to which this project can be applied is endless and limited only by the imagination. Moreover, the exercise described here can be used at many levels of the educational system including elementary school, high school, and community service clubs such as Girl and Boy Scouts.
When the stamp project is used in a history of psychology class, students can select an historical figure of interest and design the artwork for the stamp. Photographs of the individuals can be downloaded from the internet and incorporated into Zazzle. The instructions are easy to follow and a stamp can be created within 15 minutes. An example of the artwork for a Charles Henry Turner stamp is shown in Fig. 1.
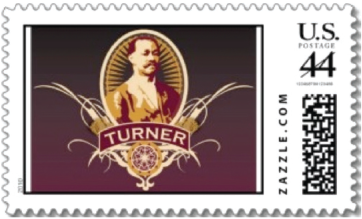
A sample Charles Henry Turner stamp
Artwork has been created for a number of historical figures in psychology including those for Mary Whiton Calkins, Christine Ladd Franklin, and Margaret Floy Washburn. In the version of the exercise we currently use, students select the individual(s) to be honored near the end of the semester after having time to study the achievements and impacts of many individuals of importance to psychology. Students participate in a debate as to why one psychologist should be honored and another is not. We found that such a debate brings into focus the advantages and disadvantages in the ways history is presented. For example, if history is presented as a series of achievements by great persons why should a stamp be developed for the “not so great”. Moreover, students learn about the process that the U.S. Postal Service uses to select individuals to be honored with a commemorative stamp. Once the selection is made, students individually or in groups design the stamps as an independent project.
It is important to note that the stamps do not have to represent individuals; psychological movements and schools of psychology can also be represented. Students find designing a “theme” stamp challenging. As an instructor, it is especially interesting to see what themes students associate with a particular school or psychological movement. For example, the stamp design most often associated with behaviorism is some type of apparatus such as a maze or operant chamber and those associated with cognitive psychology, a brain or computer. The stamp design most often associated with comparative psychology contains several animal species.
Another variation we have used is to ask students to design a commemorative series. One of the more popular topics is the “women in psychology” series. Here, students design stamps associated with the historical achievements of the first generation of women psychologists. Many commemorative series can be developed and is limited only by the imagination and creativity of the instructor and students. Once the stamps arrive, students either use them as regular U.S. Postage stamps or have the sheet framed.
In addition to its use in a history of psychology class, another use for the stamp project is as a departmental fundraiser. In our department, the typical fundraiser for psychology club and Psi Chi are T-shirts. Over the last few years we have increased the offerings to include calendars and trading cards. The trading cards resemble baseball cards and include a photograph of the subject with such “vital statistics” on the reverse side as field of study, significant events, and publication number. Both the calendar and trading cards represent various themes including departmental faculty, African Americans in psychology, and women in psychology (Abramson, et al., 2009). The stamp project makes a welcome addition to calendars and trading cards as unique fundraisers and gifts.
Step by step guide to create a stamp
Go to http://www.zazzle.com/custom/stamps. Click the Sign In link in the upper right hand corner. You will register for a free account, enter an email address, a password and age verification. Click the Continue button and a successful confirmation message appears. Click once again on the Continue button and you will return to the custom stamp page. Next, click on the orange Create Postage button and the Get Started quick interface will appear. Click on the Skip This Step button on the bottom right hand side of the frame to close the interface. Due to the limited nature of this quick interface and the problems encountered by the students we have chosen to guide you through the full functioning product design interface.
When you click on the Skip This Step button, a webpage with a picture of a blank postage stamp and the product design interface will appear. Under Number 2 of the design interface, click Choose Your Denomination and Size. It is important that you select your denomination and size first, so that when you add and edit your image or text, it will appear exactly as it will in its final printed form. You will now be given the option to choose the rate and size of the postage stamp. Choose the appropriate rate from the drop down menu. Selections range from postcard, first class to priority mail. After choosing the rate, select the size. Options are small (1.8″ × 1.3″), medium (2.1″ × 1.3″) or large (2.5″ × 1.5″). Click on the appropriate size for your stamp. You will also be given the option to choose the orientation of landscape or portrait under the Customize It! button. You are now ready to customize the stamp. Click on Customize It! under Number 1. Beneath the Add Text button is a Select a Value drop down menu, click on it and select the orientation of your stamp by choosing landscape or portrait from the options. You are now ready to add an image and text. Click on the Add Images button to add an image. An Add Images window will appear with two choices for image sources, My Computer and My Images. Choose the My Computer button by clicking on it. A Select Images to Upload button will appear. Click on this button to bring up a Select File window on your computer and locate the file. Under Upload Images, the file name should appear with the prompt: Ready to Upload under the file name. Click the OK button to upload the image.
Depending on the transfer speed of your network, this upload process may take a few seconds. When the upload is complete, your image will appear in the previously blank space of the postage stamp. Alternatively, if you have designed the stamp using a photo editing program, have no additional text to add, and are satisfied with the way the stamp appears, select the button Add to Cart and proceed to check out.
If you have decided to design your stamp using the Zazzle website, the image can be edited and arranged by using the design interface. The image can be moved up, down, left, or right by using the 4-directional toggle button that resembles a plus sign. Click on the center of the toggle to center the image. The image may also be centered horizontally, centered vertically, resized to fit or fill, rotated left or right as well as sent to the back or front by clicking on Arrange and selecting the appropriate action under the drop down menu. You can also add a background color or colored border to the stamp by clicking on Edit and selecting the Background or Border options. A pop up window will appear, allowing you to choose the desired color.
When you have arranged the image and added the background and border, text can be added by clicking on the Add Text button. A text window will appear. Type in the desired text and click OK. The text will appear at the bottom of the stamp. The orientation and location of the text can be edited or moved using the same operations utilized previously with the image. To select a different font, click on the “f” and a pop-up window will appear that provides a choice of 308 different fonts and a visual example of each font. Choose the desired font by clicking on it, and then click on Close to return to the design interface. Next to the font button are controls to change the font size and color, rotate the text and a drop down menu to choose right, left or centered alignment. You can also select to cut, copy, paste or delete the text under the Edit menu. When the design is complete, choose to Save, Email, Post for Sale, Start Over, or Revert to Previous Design by selecting the appropriate command located under the design interface. You also have the option to add it to your cart by selecting the Add to Cart button and proceeding to check out.
The design is saved to your account and can be accessed at any time by clicking on the User's Name at the top right hand corner of the webpage and selecting My Account from the drop down menu. Zazzle also saves all the uploaded images and can be accessed through clicking on My Account and choosing Images from the available tabs. My Account also allows access to your profile, order history, account setting, wish list, uploaded images, products, store and earnings. We have created an instructional video describing the process of creating a stamp. The video can be found at http://www.youtube.com/watch?v=LHLVk660Ba4.
The use of QR Codes
In order to add additional information to the stamps, Quick Response Code or QR Codes can be used. AQR Code is a two dimensional symbol that contains data. Bar codes can also be used. Both types of codes are used to obtain information about the subject of your stamp and can be scanned using smart phones. The codes can store such information as website links, pictures, alpha-numeric text information, addresses, and contact information. The list of applications for the QR Code grows daily.

An example of a stamp series commemorating the contributions of the Japanese to psychology
Most consumers are familiar with the bar code, and recognize its use as a UPC symbol on products purchased from a store. It can store information horizontally and can be read by many scanners; however since the data storage is one dimensional, bar codes are limited in the amount of data that can be accessed.
The QR Code has the advantage of storing information both horizontally and vertically, allowing for the storage of more information than the one-dimensional bar code. Smart phone reader apps are also more readily available for the QR Code. There are many free online code generators from which to choose and can be found by typing in bar code generator or QR code generator in any search engine.
We chose to use the free on-line generator from BarcodesInc, because of the wide array of code options and ease of use. In addition, the quality of the symbol is sufficient to be scaled to different sizes. The smart phone app readers we tested are able to read the codes with little to no errors.
We used the following two website pages from BarcodesInc's site to create the codes: 1) bar code generator, http://www.barcodesinc.com/generator/index.php, and 2) QR code generator http://www.barcodesinc.com/generator/qr/. Both web pages provide a box in which to type in your text. In order to create a bar code, simply type in the desired text, and click on the Generate Barcode button. Then click on the generated barcode and it will take you to the code. Right click on the image and save it to your computer. This bar code can be inserted into the postage stamp template using a photo editing program. At the time of this publication, the Zazzle design interface does not provide for a way to utilize multiple images within a stamp design. In order to use the bar code or QR code within the stamp design it is necessary to design the stamp using a photo editing program such as Photoshop and then uploading the image to Zazzle.
BarcodesInc's QR code generator allows you to choose from seven different sizes ranging from 100×100 to 500 × 500. Select the desired image size from the drop down menu, then type in the text to be embedded into the QR code and click on the Create QR Code button. Right click on the generated QR Code image and save it to your computer. The QR code can then be inserted into the stamp design template using a photo editing program.
Students used the bar codes and QR codes in their stamp project to link to websites containing additional information on their person or concept. For example, the QR code on the Charles Henry Turner stamp is linked to the website: http://psychology.okstate.edu/museum/turner/turnermain.html. In addition, students that did a stamp series such as “Japanese in Psychology” chose to link their stamps to the Japanese in Psychology website (http://psychology.okstate.edu/museum/japanese/) to encourage students to explore not only the individuals commemorated in the stamps but also other individuals that contributed to that category. We have created an instructional video describing the process of incorporating a QR code into a stamp. The video is available at: http://youtu.be/kWw2pwnYqF8
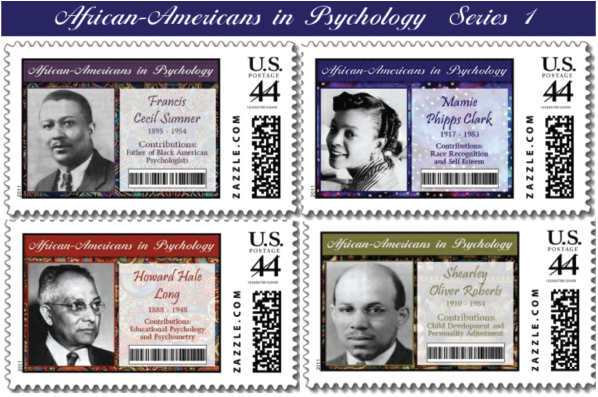
An example of a stamp series commemorating the contributions of African Americans to psychology
Problematic issues
There were several problems encountered by students on their stamp project. First, some students lacked the rudimentary technical experience necessary to use Zazzle's Design Interface, smart phone code reader apps and the use of photo editing design software. We addressed these issues by creating step-by-step video tutorials on the use of the Zazzle website, creating QR codes, using the apps to read them, and a quick how-to on using one of the most popular photo editing programs Photoshop.
Secondly, there were a few issues with the Zazzle website itself. Zazzle lists two different size guides for the production of the stamps. They request that the images be in a resolution of 300 dpi, but give a guide size in 200 dpi. This problem can be solved by using their download guide templates at http://www.zazzle.com/custom/guidefiles#stamp.
Another problem with the Zazzle website is the Get Started Quick Interface. It does not allow you to use the full design features. The inability to use all of the design features was the rationale behind our decision not to recommend it for this project. Instead, we suggest going directly to Zazzle's full design interface module.
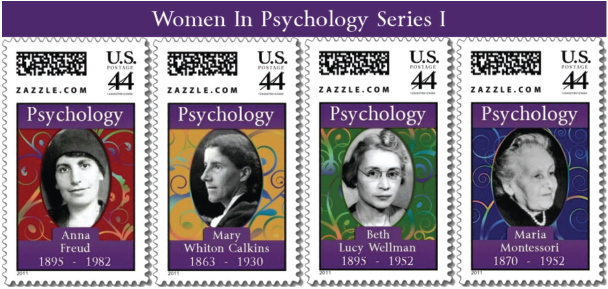
An example of a stamp series commemorating the contributions of women to psychology
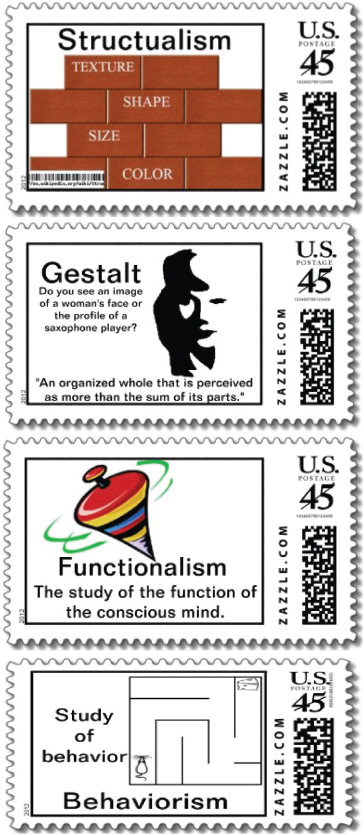
An example of a stamp series highlighting classical schools of psychology
The full design interface was also not without issues. It is necessary for the user to choose the denomination and size of stamp before beginning to customize the stamp. Additionally at the time of this publication, Zazzle does not allow for the creation of a series of stamps in one book. Each stamp in a series must be created individually and printed in its own book. The Zazzle website customer service has indicated that they would be interested in adding this feature in future developments of the application.
We also experienced a few issues with generating the bar codes and QR codes. Bar codes are one-dimensional and can only store information horizontally, thus limiting the amount of data that can be contained in the code. Some of the newer smart phone reader apps do not contain an option to read a bar code. For these reasons, we would recommend using the QR codes for future projects and phase out the use of the bar code.
Similarly, we explored using micro-QR codes, which are smaller versions of the standard QR code, but experienced similar problems as with the bar codes. The micro-QR codes can only hold up to a maximum of 35 characters, limiting the amount of information that can be encoded into the symbol. We also found that many of the readers were not equipped to read the micro-QR codes and would give an error. Therefore, we decided not to use the micro-QR codes for this project.
Since QR codes are in the early stages of development, we found that not all app readers or generators were created equal. Some generators are better than others and not all reader apps can read QR codes generated by another application. We addressed this issue through trial and error, finally deciding upon the QR code generator from BarcodesInc http://www.barcodesinc.com/generator/qr/. This generator is free, has a user friendly interface, allows the user to choose the size of their QR code, generates a high enough quality image that the QR code can be resized in a photo editing program, and it generated QR codes that were readable by the majority of smart phone apps.
Lastly, if the stamps are going to be used outside the educational setting such as a way to generate revenue, then it is vital that the students are aware of copy right laws and obtain permission prior to use of the images in their designs.
An example of a stamp with text

An example of a stamp with a quick response code linking to a website
Students found the project fun and informative. One student expressed that she “liked searching for the pictures and doing research in a new way.” Another student stated that the project had taught him that “exploring history can be fun.” Several students liked the group aspect of the stamp project, one student in particular proclaimed, “It was the best experience I have had on any group project. Everyone did their work and we were actually excited about sharing with one another the information we had discovered.”
There were a few negatives to different aspects of the stamp project. Some students expressed that they found it difficult to choose which pictures to use and did not like the pictures that showed the individuals smoking or drinking. One student found it particularly challenging to research their subjects' lineages stating that he “had to search people back to [their] heritage to make sure they were Hispanic because of the women marrying an American husband.” A few students found the website's quick interface difficult to intuitively navigate. However, none of the dislikes were substantial enough for the students to abandon the project.
Students reported selecting the subjects for their stamps based on a variety of reasons such as exploration of their cultural heritage, wanting to find strong women as role models, and lack of in-depth knowledge about the subject. One student explained, “I was simply curious to know more. I hadn't heard about this information in other classes.”
In conclusion the stamp project is easy to implement and is an enjoyable activity. Like the calendars and trading cards, not only can commemorative stamps be created for any topic or individual in the social sciences, it can be expanded to include the natural sciences, and the humanities. The stamps, calendars, and trading cards may also be an interesting way to introduce high school students to the major movements and figures in psychology.

An example of a stamp series commemorating the contributers of Native Americans in psychology