
Abstract

Introduction
The performance of total ankle arthroplasty (TAA) in patients with severe preoperative deformities presents significant challenges.5,6,10 Achieving precise alignment correction is crucial for the long-term survivability of TAA.1,5 Although a severe varus deformity of the ankle—particularly greater than 15 degrees—has traditionally been considered a relative contraindication to TAA,6,10 recent evidence suggests that such deformities may be successfully corrected with the appropriate technique in experienced hands. 9 Nevertheless, these cases remain challenging in general clinical practice, because such deformities often lead to misalignment during implantation and imbalance in soft tissue tension. These factors increase the risk of edge loading and can ultimately result in early implant failure.2,5,7 The Trabecular Metal Total Ankle System (TM Ankle; Zimmer Biomet, Tokyo, Japan) offers several potential advantages: its trabecular tantalum surface promotes osseointegration; the lateral approach enables curved resections that minimize bone loss; highly cross-linked polyethylene enhances wear resistance and durability; and the ability to adjust fibular length after implantation allows precise coronal plane alignment.3,4,8 However, in cases of severe varus deformity, bony conflicts between the lateral distal tibia and the lateral aspect of the talar dome make it difficult to achieve proper alignment using manufacturer’s recommended standard bone cutting sequence of the TM Ankle.
To address this challenge, we developed a novel technique to facilitate alignment correction by resolving bony conflicts. This technique is applicable to varus deformities at the level of the ankle joint, including both congruent and incongruent types. It is not indicated for deformities arising from tibia vara, varus knee osteoarthritis, or cavus foot deformities originating at the Chopart joint. This article describes a method for correcting severe preoperative intraarticular varus deformity of the tibiotalar joint to consistently achieve a neutral position using a transfibular TAA.
Technique
An indication for this technique is a case in which, on preoperative anteroposterior radiographs with valgus stress, the superior surface of the talar dome cannot be corrected to a position perpendicular to the tibial axis (Figure 1). Following manufacturer’s instructions for the TM Ankle, a longitudinal incision is made along the fibula. The fibula is osteotomized in an oblique direction, and the lower leg is placed on the alignment frame. A calcaneal pin is inserted into the calcaneus, parallel to the plantar surface, and the sole is held on the footplate. A medial talar half-pin is inserted and fixed to the talar pin post on the footplate.
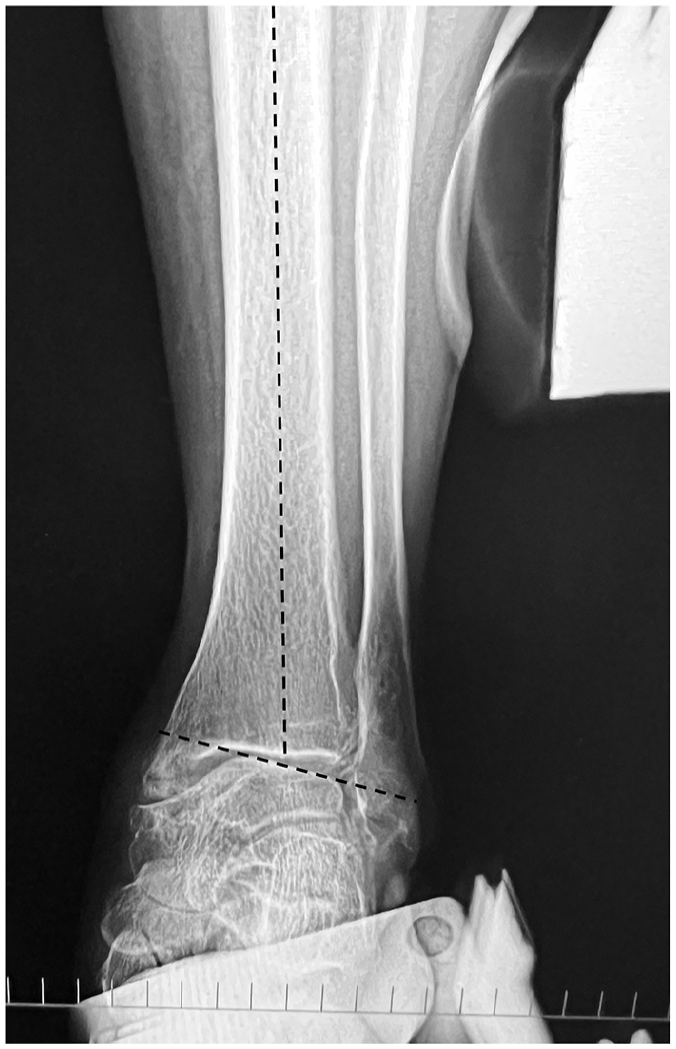
Anteroposterior radiograph of the ankle under valgus stress. Varus correction is insufficient, as the dome of the talus does not achieve a position perpendicular to the tibial axis.
A distal tibial pin is inserted from the anterior aspect approximately 5 cm proximal to the tibiotalar joint and secured to the frame. The silhouette guide is placed laterally, and the cutting guide system is adjusted until it overlaps with the talar dome (Figure 2). After securing the cutting guide system in this position, the silhouette guide is removed, and the cutting guide is attached. Next, precut for the lateral part of the distal end of the tibia is performed through the TIBIA #2 hole to resolve the bony conflict between the lateral wedge of the talus and the distal end of the tibia (Figure 3). This “TIBIA #2 technique” uses the hole originally designated for adjunct bone cutting after the main cuts using the TALUS and TIBIA #1 holes in the manufacturer’s instructions (Figure 4). After disconnecting the distal tibial pin from the frame, the surgeon manipulates the alignment frame and allows a valgus orientation of the frame to correct the varus deformity (Figure 5). In more severe varus deformities where correction remains difficult even at this stage, the medial gutter is opened anteriorly to perform superficial deltoid ligament release and osteophyte removal. Once all the connections between the pins and frame are locked, the coronal alignment is assessed using fluoroscopy. On anteroposterior imaging, the talus dome should be parallel to the horizontal axis and the tibia should be parallel to the vertical alignment rod (Figure 6). Subsequently, the ankle joint is distracted along the alignment frame to ensure resection of an appropriate amount of bone from both the tibial and talar sides, while maintaining tension in the medial soft tissues. After the final confirmation of the osteotomy position using the silhouette guide on the lateral imaging, the standard bony resections with the router is performed with the standard order of “TALUS,” “TIBIA #1,” and “TIBIA #2” positions on the cutting guide (Figure 4). This is followed by trial and prosthesis insertion, according to the manufacturer’s instructions. The fibula is then shortened and fixed in a more valgus position with a plate or screws to correct the coronal deformity. The fixation position of the fibula is determined based on the congruency between the articular surface of the lateral malleolus and lateral wall of the talus (Figure 7). The wound is closed after Broström repair of the anterior talofibular ligament (Figure 8).
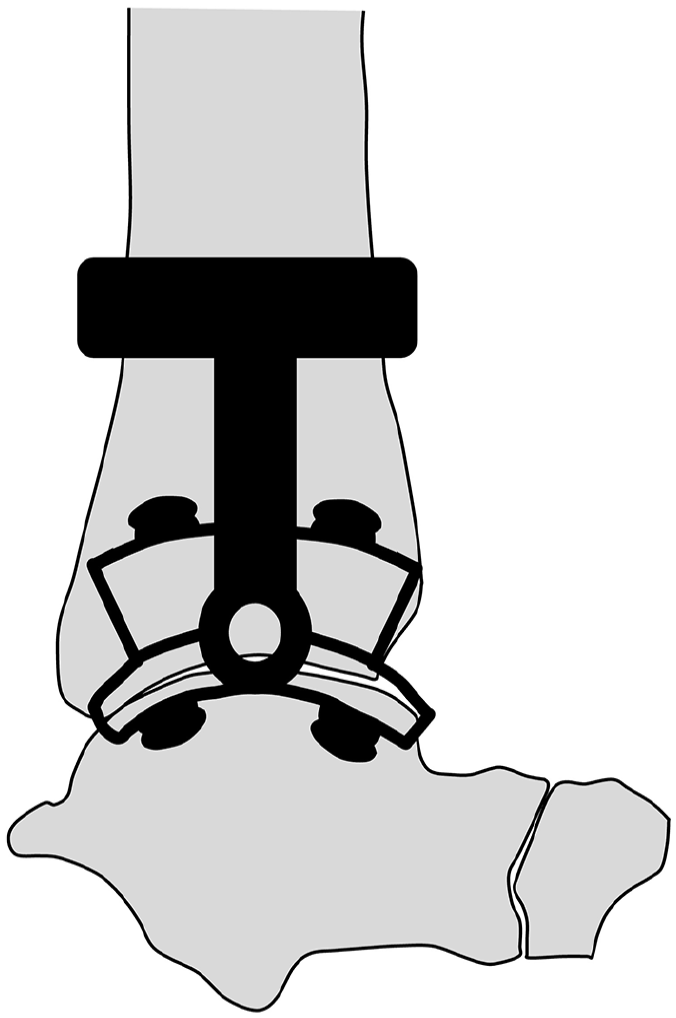
The silhouette guide attached to the cutting guide system is positioned laterally on the ankle and aligned with the talus to determine the placement of the cutting guide.
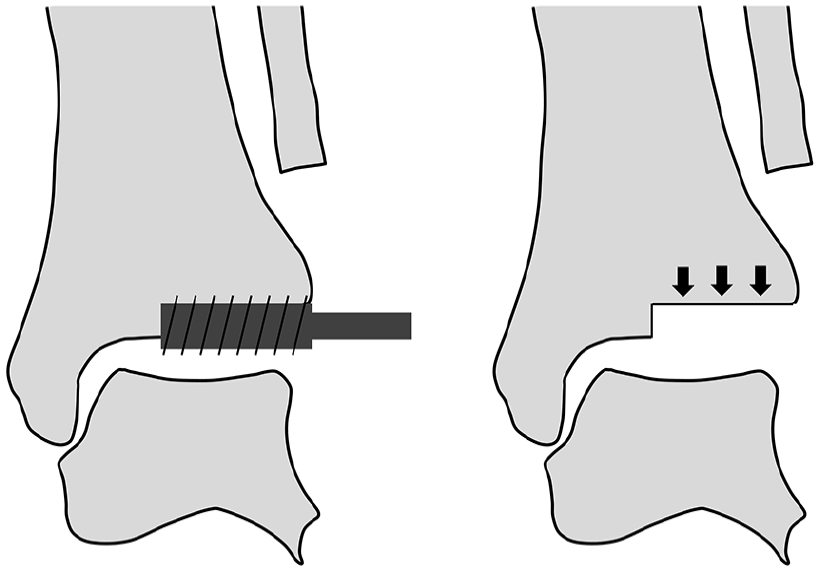
Intraoperative images demonstrating the TIBIA #2 technique. Resection of the lateral half of the distal tibia is performed through the “TIBIA #2” hole of the cutting guide (left), and completion of the resection is shown with the resected lateral tibial segment indicated by arrows (right).

Standard bone cutting sequence following the manufacturer’s instructions. The cutting guide with the “TIBIA #2,” “TALUS,” “POSITION,” and “TIBIA #1” holes is shown (left). The anteroposterior (center) and lateral (right) radiographs of the ankle illustrate the corresponding locations of the bone cuts based on the guide. Talar resection is first performed through the “TALUS” hole of the cutting guide, followed by tibial resection through the “TIBIA #1” hole. After removal of the remaining tibial bone wafer, the final tibial resection is completed through the “TIBIA #2” hole.

Lower limb alignment before and after performing the “TIBIA #2 technique.” When the plantar surface is placed on the footplate, the alignment frame remains in a varus position (left). After performing the “TIBIA #2 technique,” valgus correction of the frame results in alignment parallel to the tibial axis (right).
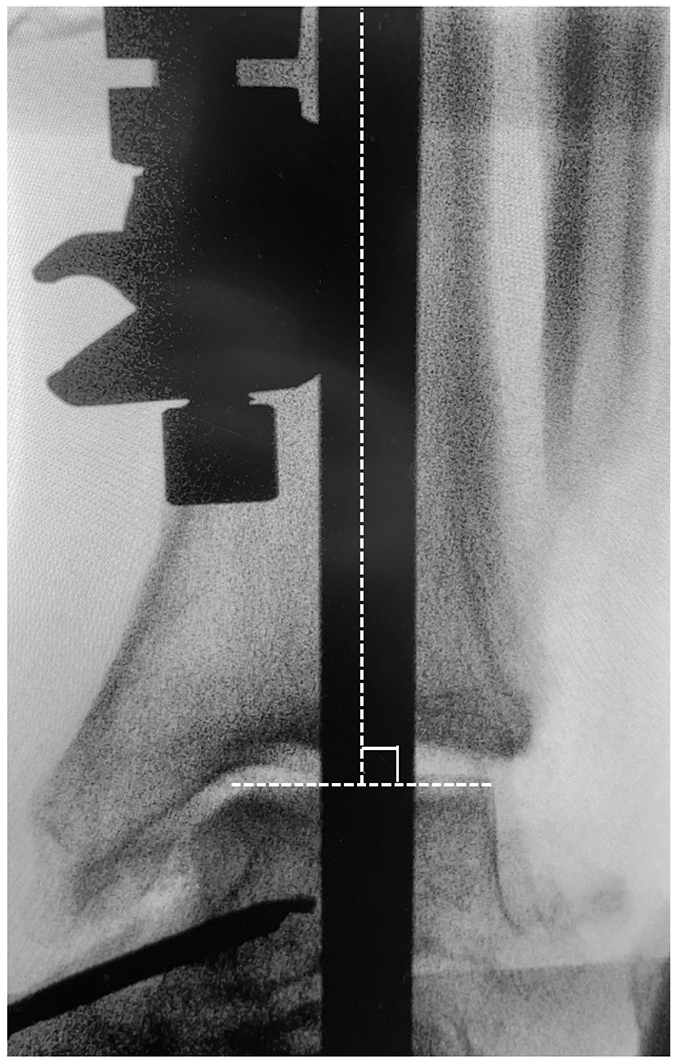
Intraoperative anteroposterior fluoroscopic image demonstrating coronal alignment after locking all connections between the pins and the alignment frame. The dome of the talus is parallel to the horizontal axis, and the tibial shaft is aligned with the vertical alignment rod, confirming orthogonal positioning for implantation.
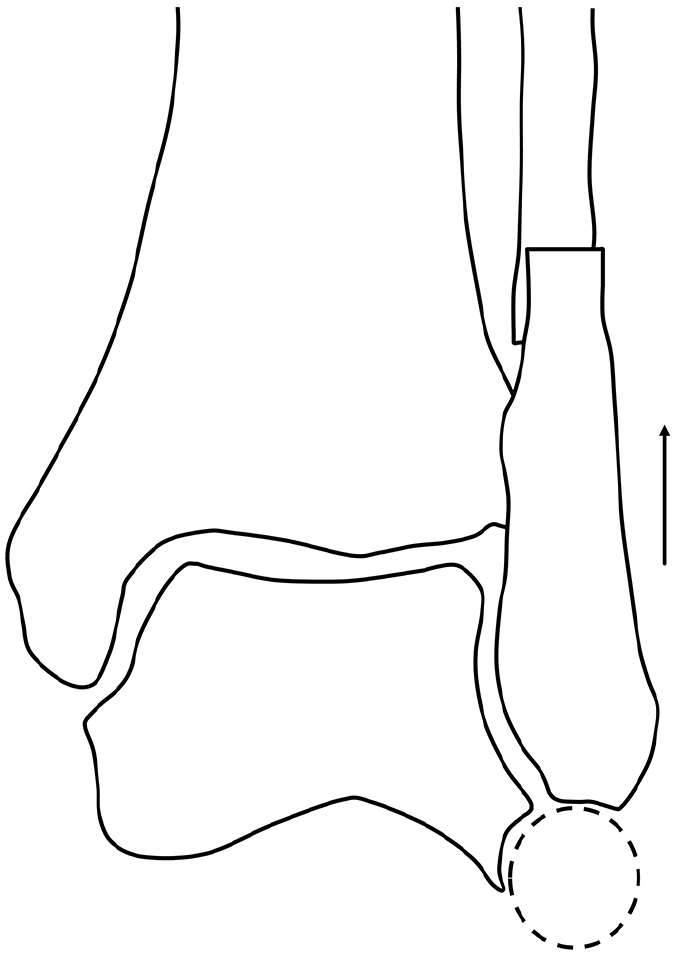
The fixation position of the fibula is determined to ensure congruency between the lateral wall of the talus and the distal end of the fibula (dashed circle).

A 65-year-old male patient with primary osteoarthritis of the ankle underwent deformity correction using the “TIBIA #2 technique.” Preoperative weightbearing anteroposterior radiograph shows a 17.9-degree varus deformity of the talar dome (left), whereas the 6-month postoperative radiograph demonstrates successful varus correction (right).
Discussion
The “TIBIA #2 technique” is a novel procedure developed to address these issues in the TM Ankle. This allows for accurate implant placement and is expected to stabilize the postoperative outcomes of transfibular TAA. One of the key advantages of the TIBIA #2 technique is that it allows for coronal plane correction through selective lateral tibial plafond milling, enabling realignment of the talus without the need for medial malleolar osteotomy or deltoid ligament release in most cases. This approach preserves medial structures, thereby maintaining the talar blood supply and minimizing soft tissue disruption. Repositioning the fibula—often into a more valgus orientation—further aids in overcoming the geometric constraints of the varus mortise. The disadvantage of this technique is the increased operation time due to additional bone cutting. This represents a reasonable trade-off for achieving reproducible orthogonal implantation in challenging cases with severe varus deformity, and technical proficiency should reduce operation time. In the early stages of using this technique, the additional surgical time exceeded 30 minutes. With increasing experience, the additional time has been reduced to approximately 10 minutes.
Supplemental Material
sj-pdf-1-fao-10.1177_24730114251352502 – Supplemental material for A Novel Tibial Precut Technique for Varus Deformity Correction in Transfibular Total Ankle Arthroplasty: A Technical Tip
Supplemental material, sj-pdf-1-fao-10.1177_24730114251352502 for A Novel Tibial Precut Technique for Varus Deformity Correction in Transfibular Total Ankle Arthroplasty: A Technical Tip by Koichiro Yano, Katsunori Ikari, Masataka Kakihana, Yuki Tochigi, Ken Okazaki and Lew C. Schon in Foot & Ankle Orthopaedics
Footnotes
Ethical Approval
Ethical approval was not sought for the present study.
Declaration of Conflicting Interests
The author(s) declared the following potential conflicts of interest with respect to the research, authorship, and/or publication of this article: Koichiro Yano, MD, PhD, Katsunori Ikari, MD, PhD, Yuki Tochigi, MD, PhD, and Lew C. Schon, MD, report disclosures related to manuscript from Zimmer Biomet. Disclosure forms for all authors are available online.
Funding
The author(s) received no financial support for the research, authorship, and/or publication of this article.
References
Supplementary Material
Please find the following supplemental material available below.
For Open Access articles published under a Creative Commons License, all supplemental material carries the same license as the article it is associated with.
For non-Open Access articles published, all supplemental material carries a non-exclusive license, and permission requests for re-use of supplemental material or any part of supplemental material shall be sent directly to the copyright owner as specified in the copyright notice associated with the article.