
Abstract
This protocol focuses on the culture of cells harvested from hepatocellular carcinoma (HCC) patient-derived xenografts (PDXs) as organoids using a cellulosic macroporous sponge scaffold. Compared with many other epithelial cancer types, the viability of HCC cells directly derived from patients or PDX models is notoriously challenging to maintain in vitro. We previously developed a macroporous sponge scaffold uniquely designed to provide biochemical and mechanical cues that support the culture of normal hepatocytes as spheroids with maintained functionality. Leveraging our success using this sponge scaffold to maintain normal hepatocytes in vitro, we recently demonstrated that a similar sponge scaffold enables the maintenance of HCC PDX cells as organoids with preserved viability, molecular features, and heterogeneity.
Introduction
Hepatocellular Carcinoma
Liver cancer is the fourth most lethal cancer worldwide. 1 Liver cancer presents an important public health issue in many countries due to its highly aggressive nature and poor survival rate. Hepatocellular carcinoma (HCC) is the most prevalent form of primary liver cancer and accounts for up to 85%–90% of cases. The incidence rate of HCC is rising in many countries due to the increasing prevalence of associated risk factors such as diabetes and obesity. 2 Other well-recognized risk factors for HCC include chronic hepatitis B or C infection, exposure to dietary aflatoxin, alcohol-induced cirrhosis, and smoking. 3 HCC patients of intermediate stage can be treated with various locoregional therapies, whereas those with advanced HCC can only be treated with systemic therapies. Sorafenib, a multikinase inhibitor with antiangiogenic effects, has been the mainstay first-line therapy for advanced HCC patients since its approval in 2007. 4 Other targeted therapies approved for the management of advanced HCC include lenvatinib as a first-line treatment and regorafenib and nivolumab as second-line therapies after progression on sorafenib.5–7 Despite the clinical benefits achieved from recent studies, improvement on overall HCC patient survival outcomes has been modest. Therefore, there is an urgent need to develop better and more efficacious therapies through in-depth studies on the biology of HCC development and progression using patient-representative preclinical models.
Patient-Derived Xenografts
Patient-derived xenografts (PDXs) models are the gold standard for preclinical studies due to their ability to recapitulate the heterogeneity of human cancers and are therefore invaluable tools for translational cancer research. 8 PDXs are generated by inoculating primary tumors directly from patients into immunodeficient mice. Numerous studies have shown that PDX tumors are more superior than conventional immortalized cell lines for studying drug responses due to their ability to more accurately mimic the human tumor microenvironment with an intact vasculature system, tumor-associated macrophages, extracellular matrix compositions, and cancer-associated fibroblasts. 9 However, PDX models have their limitations. First, establishing PDX tumors in animals typically takes 3–12 months, depending on the engraftment rate. Second, growing and maintaining PDXs is highly expensive and labor-intensive, as tumors from different patients have variable growth rates. Hence, large-scale screening of drug libraries in PDXs is highly impractical and noneconomical. Third, because most PDXs are grown in immunocompromised animals, the study of immuno-oncology would be not possible due to the lack of immune system-related components in the model. Nevertheless, PDX models are still powerful preclinical tools for modeling patient tumors.
Sponge System for 3D Culture
In seeking to maintain the functionality of cultured normal hepatocytes in vitro, we previously developed soft macroporous hydrogels capable of physically constraining seeded hepatocytes to encourage organoid formation. 10 Fabricated from thermoresponsive hydroxypropylcellulose (HPC), these sponge-like hydrogels form after temperature-mediated phase separation and cross-linking. With tunable macroscale porosity to control organoid size and functionalizable surfaces, we showed that conjugated galactose ligands present chemical cues, while the in vivo-like stiffness of the sponge provides mechanical cues to enable primary hepatocytes to form organoids.11,12 Hepatocyte organoids grown in the sponge maintain a three-dimensional architecture and exhibit improved functionality as compared with collagen sandwich cultures. 11 Importantly, these hydrogels were amenable for the culture of primary hepatocytes as organoids to study hepatitis C infection, 13 as well as pluripotent stem cell-derived hepatocyte-like cells for hepatotoxicity testing. 14 Hypothesizing that this sponge hydrogel system would similarly support the culture of cancerous hepatocytes, we recently showed that HCC PDX cells cultured in this system formed organoids with a 75% success rate, remained viable for at least 2 weeks in culture, and preserved the genomic and transcriptomic profiles as well as intratumoral heterogeneity of their in vivo counterparts. 10 Of note, cancer organoids here refer to 3D, self-organizing cellular aggregates generated directly from PDXs for short-term culture; due to the physical constraint imposed by the sponge scaffold, these PDX organoids have a limited capacity for expansion, unlike organoids grown using basement membrane extracts and tissue-specific growth factors. 15 Here, we describe the use of this cellulosic sponge system to culture HCC PDX cells as organoids to enable increased throughput for drug testing.
Materials
Synthesis of Methacrylate-HPC
HPC (Mn = 10,000 g/mol) (Sigma-Aldrich, Singapore)
Methacrylic anhydride (94%) (Sigma-Aldrich)
Triethylamine (99%) (Merck, Singapore)
Dichloromethane (Fisher)
Anhydrous diethyl ether (99%) (Fisher Scientific, Singapore)
Sponge Fabrication
Glass test tubes (6 mm diameter)
1 L glass beaker
Dry acetone (AR grade)
1,1′-Carbonyldiimidazole (CDI)
D-(+)-galatosamine HCl
Sodium bicarbonate buffer
Dulbecco’s phosphate-buffered saline (PBS)
Deionized water
Cell Isolation from PDX Tissue
Collagenase/dispase (1 mg/mL)
Dulbecco’s PBS
1× red blood cell (RBC) lysis buffer
DNase I solution
Growth Media
Dulbecco’s modified Eagle’s medium (DMEM)
Fetal bovine serum
Penicillin-streptomycin
Live/Dead Assay
Calcein-AM (2 µM)
Propidium iodide (25 µg/mL)
CellTiter-Glo Assay Assay
CellTiter-Glo (Promega, Singapore)
Immunostaining
Anti-Ki-67 (Merck)
Goat anti-rabbit secondary antibody (Abcam, Singapore)
Phalloidin to visualize structure
DAPI
Reagents for Isolating RNA/DNA/Proteins
RNeasy Plus Mini Kit (Qiagen, Singapore)
Required Equipment
Standard humidified cell culture incubator (5% CO2, 37 °C)
Cell culture flow hood
Confocal microscope
Nanodrop
Light microscope
Luminescence plate reader
Freeze-dryer
–80 °C freezer
Rotary evaporator
Water bath
Krumdieck tissue slicer
Methods
MA-HPC Synthesis
Dissolve 4 g of HPC (MW 80 kDa) in 100 mL of dichloromethane in a 250 mL round-bottom flask and stir vigorously (at 500 rpm using a 2.5 cm stir bar) until fully dissolved. Ensure that the flask is sealed with parafilm during the dissolution process, which should take 3–4 h.
While stirring at 1000 rpm, add methacrylic anhydride dropwise (3.48 mL, 2 equiv.) into the reaction mixture using a syringe. The viscosity of the reaction mixture should decrease following the addition of methacrylic anhydride.
Add triethylamine (1.64 mL, 1 equiv.) into the reaction mixture as the base catalyst.
Stir the reaction mixture for 24 h at room temperature; the reaction mixture should turn yellow.
Add 500 mL of anhydrous diethyl ether (or fivefold excess of the MA-HPC reaction mixture to be precipitated) into a 1 L round-bottom flask. Then, pour the reaction mixture into the diethyl ether under vigorous stirring (1000 rpm). White fibers will precipitate out of solution.
Discard the cloudy ether/dichloromethane by pouring it out and add 300 mL of fresh ether. Repeat this washing step twice until the ether is clear. Decant again.
Dry the resulting MA-HPC fibers at 40 °C for 1 h using a rotary evaporator.
Redissolve the dried fibers in 100 mL of deionized water under vigorous stirring (1000 rpm) for 2–4 h.
After the MA-HPC fibers fully dissolve, pour the MA-HPC solution into dialysis tubing (molecular weight cutoff [MWCO] = 12–14 kDa) with both ends eventually closed by tying double knots. Place the dialysis tubes under running deionized water for 48 h.
Discard any non-water-soluble products. Pour the dialyzed solution into five 80 mm culture dishes (each dish containing 20 mL). Place the dishes in a −80 °C freezer for 1 h and then in a lyophilizer to freeze-dry the product for 24 h.
Collect the resulting MA-HPC fibers and store them in a dessicator for use in fabrication of sponge.
Sponge Fabrication
Using scissors, mince the MA-HPC fibers into small pieces to facilitate dissolution. Dissolve the fibers to 10% (w/v) or 1 g of MA-HPC for every 10 mL of water in a glass vial with screw cap. Prepare four such vials (total volume of 40 mL for 4 g of MA-HPC fibers). Stir the solution for 12 h at 500 rpm at room temperature.
Pour the resulting dissolved MA-HPC in borosilicate glass tubes (6 mm diameter) and seal the tube using parafilm. Centrifuge the tubes at 200 rpm for 2 min to remove any bubbles.
Heat a water bath to 42 °C, with a 1 L glass beaker in it. Place the glass tubes in the beaker upright for 10 min until phase separation occurs. The solution in the glass tubes should turn opaque. See Figure 1 .
Remove the 1 L beaker (containing water and glass tubes) from the water bath and place the setup into a gamma irradiator for 2.5 h (dose = 5 kGy). Note: The irradiation level will depend on the current activity level of the gamma irradiation source. The gamma irradiation will cross-link the methacrylate (MA) groups on HPC.
Remove the tubes from the gamma irradiator and freeze them in dry ice for 30 min. Break the glass tubes to retrieve the cross-linked hydrogel cylinders. Alternatively, the sponge cylinders can be retrieved by using a diamond saw to cut off the bottom of the glass tube and pushing the cylinder out.
Place all the hydrogel cylinders in a large petri dish filled with deionized water.
Slice the hydrogel cylinders using a Krumdieck tissue slicer to 1 mm thickness. Note: Use 5% agar to embed the hydrogel cylinders in the slicer sample holder. The agar can be solidified by placing the cylinder in agar on ice.
Place the sliced sponges in a 20 mL glass vial containing deionized water and wash the sponges three times by replacing the water after intervals of 1, 2, and 3 h.
Pour the sliced sponges in deionized water into a 80 mm petri dish, and remove all water by pipetting. Freeze the sponges in −80 °C for 30 min.
Place the frozen sliced sponges in a lyophilizer for 1 day to freeze-dry.
Store the lyophilized sponges in a dessicator for subsequent use.
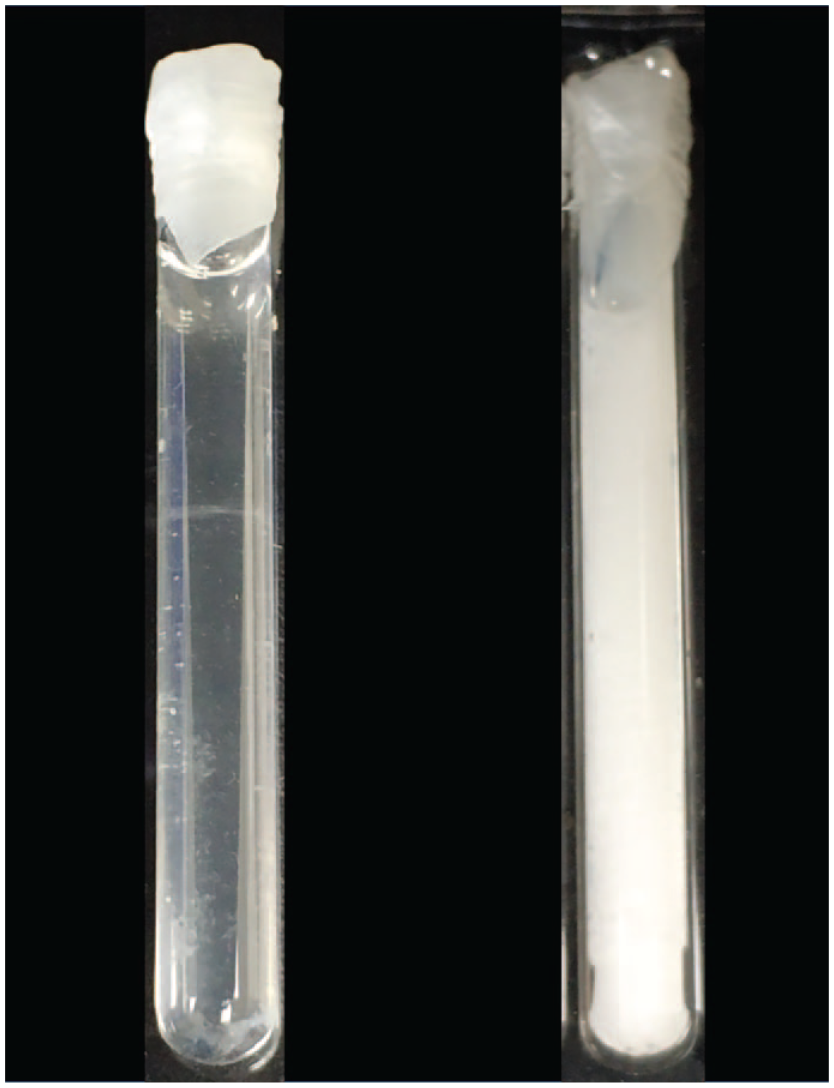
MA-HPC (left) before and (right) after undergoing temperature-induced phase separation.
Conjugation of Galactose onto MA-HPC Sponge
Soak 10 sponges with 10 mL of acetone in a 20 mL glass vial.
Place the vial on an orbital shaker overnight at room temperature. Replace the acetone with fresh acetone the next day and shake for another 1 h.
Remove the acetone and quickly add 20 mM CDI (3.25 mg/mL acetone).
Cap and seal the vial with parafilm. Place the vial on an orbital shaker at 4 °C overnight.
Place the sponges at room temperature for 30 min the next day, and then wash them with acetone three times (intervals of 10, 20, and 30 min).
Prepare bicarbonate buffer adjusted to pH 10 and sterile-filter the solution. Dissolve
Remove the acetone from the sponges and add 10 mL of the galactosamine solution into the vial.
Immediately shake the vial for 10 s, and then place the vial on an orbital shaker at 4 °C overnight.
Place the sponges at room temperature for 30 min the next day, and then wash them with DPBS three times (intervals of 10, 20, and 30 min).
Repeat the wash with deionized water three times (intervals of 10, 20, and 30 min).
Pour the sponge slices in deionized water into a 80 mm petri dish, and remove all water by pipetting. Freeze the sponges in −80 °C for 30 min.
Place the frozen sliced sponges in a lyophilizer for 1 day to freeze-dry.
Gamma irradiate the lyophilized sponges for 12 min (dose = 0.4 kGy).
Store the lyophilized sponges in a dessicator for subsequent use.
Isolation of Cells from PDX
Place fresh PDX tissues in 15–30 mL of serum-free DMEM at 4 °C and transport on ice to the laboratory for immediate processing.
Place the PDX tumor specimen in a sterile petri dish using sterile forceps and cut the tumor tissue into fragments using a No. 10 surgical blade. Mince the PDX tumor tissue into fine pieces.
Add 3–5 mL of collagenase/dispase at a final concentration of 1 mg/mL. Pipette the PDX tumor mixture using a 10 mL pipette.
Incubate the PDX tumor mixture at 37 °C in a 5% CO2 incubator for 20–60 min. Pipette the suspension and assess the state of enzymatic digestion every 10 min.
Once tissue digestion is complete, pass the tumor suspension through a sterile 70 or 100 μm cell strainer. Collect the tumor cell filtrate in a 50 mL conical tube.
Centrifuge the tumor cell filtrate at 200g for 10 min at 4 °C.
Decant and discard the supernatant. Add 3–5 mL of ice-cold 1× RBC lysis buffer (depending on the size of the tumor cell pellet) to resuspend the tumor cell pellet gently. Keep the tumor suspension on ice for up to 3 min.
Top up the DMEM to a total volume of 15 mL and centrifuge at 200g for 5 min at 4 °C.
Decant and discard the supernatant. Resuspend the PDX tumor cell pellet in 2–5 mL of DMEM (depending on the size of the cell pellet).
If tumor cells appear clumpy (if not, proceed to step 11), add a final concentration of 0.5 mg/mL DNase I to the tumor cell mixture. Incubate the mixture at room temperature for 3–5 min or until the tumor cell clump dissolves.
Top up DMEM to a total volume of 15 mL and centrifuge at 200g for 5 min at 4 °C to wash away excess RBC lysis buffer or DNase I.
Decant and discard the supernatant. Resuspend the PDX tumor cell pellet in 1–5 mL of DMEM (depending on the size of the cell pellet).
Repeat step 11 to remove any traces of RBC lysis buffer/DNase I.
Decant and discard the supernatant. Resuspend the PDX tumor cell pellet in 1–5 mL of DMEM (depending on the size of the cell pellet).
Count the number of viable cells using trypan blue exclusion either manually or with an automated cell counter.
Seed cells accordingly.
Culture of PDX Cells in Sponge
Using a sterile tweezer, place sterilized sponge slices into a 24-well plate just before cell seeding.
Concentrate the cell suspension to 15 million cells/mL to enable cell seeding at 3 × 10⁵ cells/20 µL of medium.
Pipette 20 µL of the cell suspension onto the sponge. Note: To prevent the sponge from sticking to the pipette tip, the pipette tip should not touch the sponge surface.
Forty-five minutes after seeding, add 500 µL of medium to completely submerge the cell-laden sponge samples.
Replace the medium the next day with 1 mL of medium and every 2–3 days after.
Live/Dead Assay
Remove medium from the well and add in 500 µL of fresh medium containing calcein-AM and propidium iodide at final concentrations of 2 µM and 25 µg/mL, respectively.
Incubate the samples at 37 °C for 30 min.
Using a spatula, transfer the sponge sample onto a glass-bottom dish. Note: Place the side of the sponge containing organoids (visible using light microscopy) facedown on the glass surface.
Immediately image the samples using a confocal microscope.
CellTiter-Glo Assay
At designated time points (to monitor growth or after drug exposure), use a spatula to transfer each sponge sample into microcentrifuge tubes containing 500 µL of CellTiter-Glo reagent. Use a 1000 µL pipette tip to mechanically break apart the sponge sample.
After 12 min, centrifuge the sponge samples for 10 s at high speed to centrifuge down the sponge fragments.
Transfer 150 µL of the supernatant into white, flat-bottom, 96-well plates and measure luminescence using a luminometer.
Immunostaining
At designated time points, fix the samples using 4% paraformaldehyde for 30 min.
Wash the samples once with PBS, and then store the samples in PBS at 4 °C.
Permeabilize the samples with 0.3% (v/v) Triton X-100 in PBS for 30 min, and then block the samples with 2% (w/v) bovine serum albumin dissolved in 0.1% (v/v) Triton X-100 in PBS.
Incubate the samples with the primary antibody of interest, for example, anti-Ki-67 (marker of proliferation), at the recommended dilution in the same blocking buffer at 4 °C overnight.
Wash the samples three times with 0.1% (v/v) Triton X-100 in PBS, 15 min per wash. Place the sample on an orbital shaker during the wash.
Incubate the samples with secondary antibodies (1:200 dilution), phalloidin (to visualize the actin cytoskeleton), and DAPI in the blocking buffer for 2 h at room temperature on an orbital shaker.
Wash the samples three times with 0.1% (v/v) Triton X-100 in PBS, 15 min per wash. Place the sample on an orbital shaker during the wash.
Using a spatula, place the sponge sample on a glass-bottom dish containing some PBS, and then mechanically tear the sponge apart using a pair of tweezers. The organoids should be released into the PBS solution.
Immediately image the organoids using a confocal microscope.
Notes
Ensure that the cell density is no more than 3 × 10⁵ cells/20 µL of medium. Very concentrated cell suspensions may lead to the formation of large cell aggregates on top of the sponge. Additionally, the cell density should also not be too low; cell densities less than 1 × 10⁵ cells/20 µL may result in a lack of organoid formation.
Not all cells from PDX lines form organoids. The success rate is approximately 75%. While these HCC PDX organoids have been found to express the proliferation marker Ki-67, organoids have limited expansion abilities due to physical confinement within the sponge scaffold pores.
For isolation of RNA, DNA, and proteins, there may be a need to combine several samples together.
Instead of using 24-well plates to hold the sponge samples, 48-well or 96-well cell culture plates can also be used. However, it would be more challenging to remove the sponge from the well for downstream assays. CellTiter-Glo is not added directly to the sponge in the wells, as some of the cell suspension may come into contact with the well surface. Consequently, cells may start to grow outside the sponge in the well.
Footnotes
Declaration of Conflicting Interests
The authors declared the following potential conflicts of interest with respect to the research, authorship, and/or publication of this article: H. Yu developed the sponge technology that is currently licensed to Pishon Ltd. and Invitrocue Pte. Ltd., where he holds minority shares.
Funding
The authors disclosed receipt of the following financial support for the research, authorship, and/or publication of this article: This work is supported in part by the Institute of Bioengineering and Nanotechnology, Biomedical Research Council, Agency for Science, Technology and Research (A*STAR) (project numbers IAF-PP H18/01/a0/014, IAF-PP H18/01/a0/K14, and MedCaP-LOA-18-02); MOE ARC (MOE2017-T2-1-149); IAF (H18/01/a0/017); SMART CAMP; The Institute for Digital Medicine (WisDM); and Mechanobiology Institute of Singapore (R-714-106-004-135) funding to H. Yu.